1st part of remodeling motorhome

The friendliest place on the web for anyone with an RV or an interest in RVing!
If you have answers, please help by responding to the unanswered posts.
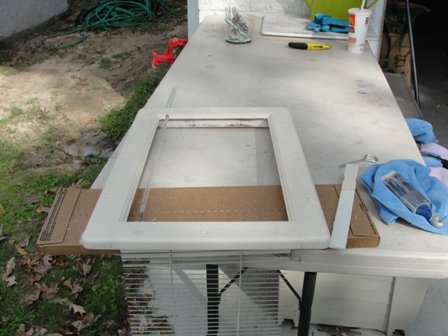
Ok, one coat of paint on the window unit for the door, need to put another.

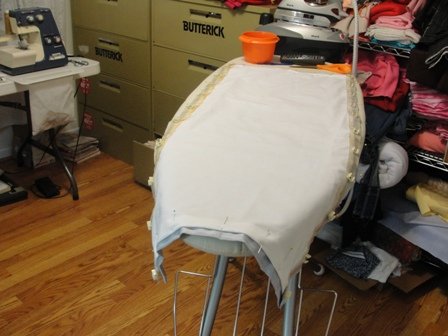
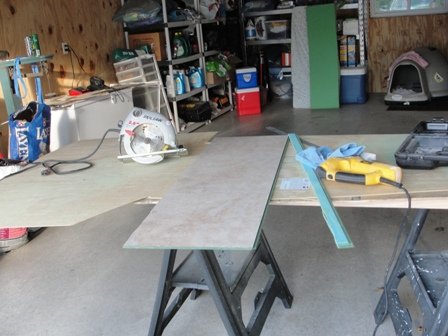
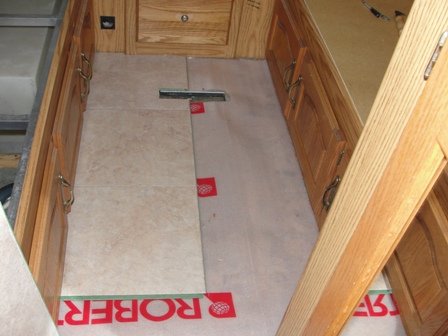
Picture of pieces of paneling for under the window and the long window.  There is styrafoam behind, if I can't find it looks like if I sandwich 3 pieces of paneling it will give the width I need.  This was a rough fit, didn't want to jam it in until I'm ready to put it permanently in place.  I cut 2 for the long piece and 1 for the other, have enough to cut 3 pieces in case I need it. 

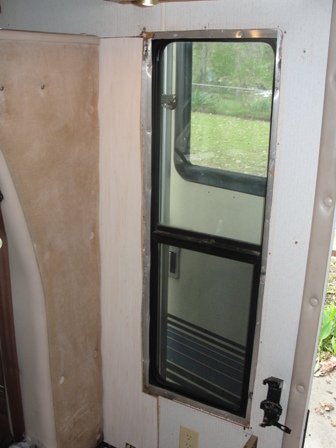
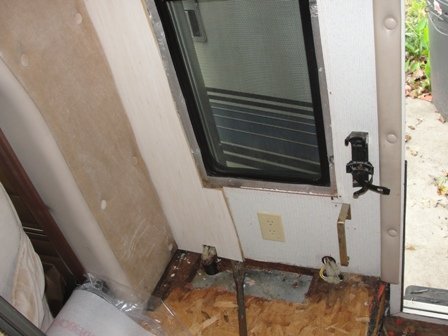
The colors don't match at all, but the upper unit, has a curtain to put back and the cushions so noone will see it.  The corner, has curtains, the privacy panel and the curtain for the upper bunk plus the chair in front of it.  Like I said before, thankfully its nowhere prominent.
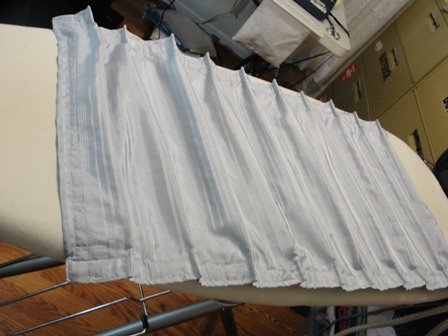
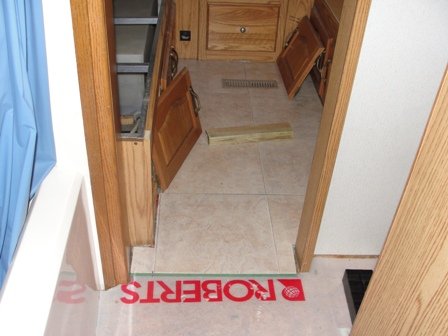
 

Attachments

  • Pictures of replacement pieces 001.JPG
    Pictures of replacement pieces 001.JPG
    92.2 KB · Views: 135
  • Pictures of replacement pieces 002.JPG
    Pictures of replacement pieces 002.JPG
    71.6 KB · Views: 134
  • Pictures of replacement pieces 003.JPG
    Pictures of replacement pieces 003.JPG
    78 KB · Views: 117
Sue Anne or Carolyn, (sorry I don't know which), you have my most esteem admiration.  I thought I had really accomplished something when I caulked, replaced clapboards, primed, and put two coats of paint on an old three-story house over two summers, when I was twenty years younger than you.  But tackling the remodeling of an RV far outshines that feat.  You are doing a terrific job, and are lucky you are able to take it on.  Keep up the exceptionally good work, and may you have many, many, pleasurable years enjoying your accomplishments.  Great Job!!!

Daisy
 
Well, I think that's quite an accomplishment, 3 stories, wow.  I did that once in an old house we bought in our 30's.  Later hubby had it sided and no more painting for us.  Now its brick all the way, and eaves and soffits are out.  I hire those to be painted, that reaching up kills me.

And by the way I'm Carolyn, DD is Sue Anne.

Well, guys I'm at an impasse today.  I put 2 panels of laminate down, it was awful getting those 2 in.  I put them long ways so I could cut the furnace duct hole out.  Then I went diagonal, I have left both boards exactly the same length so I could run the piece across, and the dang thing will not click in.  I cut more off, took off 2 cabinet doors, took down the bathroom door to get more leverage, no luck.  I quit for the day.  On top of ithat I made the task more difficult.  The kind I bought for the house was random, you do not have to match it, and not thinking I bought tile look which has to be lined up.  I have only opened one box and I hate to, but I'm thinking I"m going to have to buy the narrow stuff to be able to work this around, not enough space for those big pieces,  I sure hate to take this up.

I added a picture of what I did in the house, it was a lot of work, but not like this where it just will not fasten no mater what I do.  Now if I go longwise I will have to take that up and cut one off as it is suppose to be staggered.  I spent several hours on that.
 
Ok, here are the pictures, the piece in the doorway, the last piece is what I cannot get to fasten, left lots of room even, figured I would just have to trim it out. Anyone have any suggestions?? I cannot figure out why it will not click together, I cleaned out the channels in case something was stuck, just won't do it.

The wood stuff is in my family room, hubby did that back of the bar, I stained and polyurethaned it.  We are getting ready to put in new cabinets, hopefully this year, but I digress.
 

Attachments

  • Failure on flooring 001.JPG
    Failure on flooring 001.JPG
    89 KB · Views: 155
  • Failure on flooring 002.JPG
    Failure on flooring 002.JPG
    80.2 KB · Views: 167
  • Failure on flooring 003.JPG
    Failure on flooring 003.JPG
    76.8 KB · Views: 166
  • Failure on flooring 004.JPG
    Failure on flooring 004.JPG
    76.4 KB · Views: 215
Before giving up I may try taking all the lower doors off and seeing if that gives me leverage where I can raise the other 2 panels and click it in.  However, I'm thinking there may be an issue that you cannot connect the flooring longways then sideways.  I may try a piece in the garage and see.  Otherwise I will return the one box and get a narrower type board, the other box will be added up as a loss and lesson in learning.  That would make it much easier to handle anyway and preclude me having to match all the lines.  So lesson learned, RV flooring is not as easy as house flooring to do. Of course, hubby says, well I could make it got together.  Uhhhhh, ok, yes, dear! ;)

I have put carpet in before, but the cheaper stuff that was easier to cut, it did a great job though.

Ernie, I can certainly respect your expertise in working in those very tight quarters, it certainly is tough.

We are getting rain and flooding so likely not much going on today out there.  I am checking for anymore leaks but don't expect any.  I have plenty to do in the house to catch up so no issue there.

And the rain should really help my fall garden.  I have thumb size tomatoes, cukes, about 4 inches long, green beans blooming.  Many of the seeds didn't do well as we had a big rain after I planted them. The oranges are ripening though, generally about end of Nov or Dec for those.
 
I think they are cut different.I I was back over at Home Depot and I looked at lots of colors and kinds and I like this the best.  I LOVED the hardwoods, they are narrow planks and click together also but no color really goes and with all the wood already in there, not so good. I brought several samples home and the only one that would look good no samples, none in stock.  They even have a new vinyl tile I've never seen before, but not so sure about it. It had stinky along the edge but I can see real issues fitting that stuff, so no to that.

Ok, think I'm going to take off the rest of the doors.  Get me a new box of tools, the last ones were pretty beat up when I finished in the house, then I can unclick what is in, if not recut it, shorten one of the boards so I get my staggered pattern going and just continue lengthwise with what I've got.  It looks the best from what I looked at and I think it will be the most durable.  Also by cutting lengthwise, I can fit around that corner better and not try to bei going across so many cuts, think that will work.

Wish I had been able to seal the roof before it rained so I can see if I got it.  I think resealing the small window did slow it down though, but I'm seeing a small amount of rain coming in where the windows come together, not much but some.

Ok, I think I've got it, but its pouring out there.  DD and I have docs appointments tomorrow so not much will be done then, nor today, her allergy shot time. And maybe that movie we didn't get to see the other day.

 
I want to get out there and work, but dang, me to doc this morning.  DD to dentist at 3, tomorrow, 12:30 swim rehab tomorrow, then maybe 2 whole days to work.  Well DD needs her haircut, grows like crazy, so don't know, hate to put it off.

May bring out the lights so I can work on the flooring tonight.

 
No work today, Think I need a bit of down time.  I'm pooped, more work running around to docs then working physically.
 
When installing wood, I always ask the customer to purchase tongue and groove material. This eliminates the wide range of angles in order for the "click" together material to work and lay flat. I can understand your frustrations with this material.
Ernie- in Norco, Ca installing carpet only, in a coach.
 
I'm not sure what you mean Ernie.  Are you talking the kind you have to glue together? I saw hardwood that was narrower and just beautiful that clicked together, but I don't think any of it would have looked good with the wood color in the RV or would have looked overwhelmed by the same kind or color.

I think the issue is turning it sideways, will just try continuing longways.

I had to play catchup, I've let everything else go the last couple of weeks.  We just returned from our heated pool swim rehab session we go to twice a week.  It's so relaxing.

My cab carpet came, have to look it over and see how its going to fit and see if I have to order more for the slope from the body of the motorhome to the cab.

Ok, got to clean my chicken house and then out to wash on the roof of the motorhome and let it dry for a couple of days.  Then peel off old sealant and tape and clean with laquer thinner. Hope to get back on flooring, but maybe not till tomorrow.


The roof is scrubbed down.  I moved the motorhome back by the garage so if the sun comes out tomorrow it will dry it.  Sounds like rain for the next few days.

I think I see where the leaks are coming from.  There are 2 spots in the front and I think the 4 inches or so of carpet getting wet by the bedroom wall is pretty simple.  The middle louver of the passenger side window back there is gaping about 1/2 an inch.  I pushed it but it won't close, I didn't even notice it till I was standing above it.  Hummm, not sure how to fix that.

And yes I got the chicken house cleaned.  I put in fresh straw about every 2 weeks.  Couple years back I raised 3 dozen chickens, dressed out most, shared about 6 with the neighbors dog!! :mad:  Kept the rest for several years for eggs.  I just have 5 pullets right now, not old enough for eggs yet.  I LOVE fresh eggs, may get some more later. Also got 2 cukes from the garden and the green beans will be ready to pick in a few more days, some tomatoes now as big as cherry tomatoes, hope a freeze doesn't get them.  Other plants are coming along.  Sadly have to dust for pests, I hate to but they are munching way to much of the plants.

But not motorhome related.  The cab carpet came today, haven't looked it over yet, but think it will look very clean and bright. Don't care much for the cowling cover that came with it though.

 
Rain today and tomorrow.  Don't know if I can do anything between showers or not.  Drat!
 
All I did today was redo one of the drapery panels that goes in the cabover.  One pair of the curtains had the lining torn.  I removed it, practically had to deconstruct the curtain to redo it.  Had no sewing foot that would fit around the plastic hooks, so not the best of jobs but its ok. The hooks are really odd. If I had bought new would have had to put in new rods.  I have one more panel to reline and all the curtains have been rehemmed, washed, and now ready to put up.

I'm hoping to finish the other one tonight, or most of it.

Tomorrow rain again so they say, we are really gettin' it tonight.
 

Attachments

  • Redid drapery panel 001.JPG
    Redid drapery panel 001.JPG
    83.4 KB · Views: 83
  • Redid drapery panel 002.JPG
    Redid drapery panel 002.JPG
    78.2 KB · Views: 75
Ok, I took the flooring up and started over.  I had to cut it off on the threshhold of the bathroom, will have to have a divider or whatever those pieces are called to continue it in there.  No way to make it continuous, but probably for the best.  If it gets water as a separte piece I can replace it.

I have some of the quarterround cut but its not in, is just laying in place.  Unlike a professional I will also have to use the fill material to fill some of the voids around the edge.  Going to put some next to the tub to try and prevent water from getting on the edge.

Off to Home Depot for more flooring.  I had 2 boxes and used it all, likely 2 or 3 more will finish it.
 

Attachments

  • Flooring progress 001.JPG
    Flooring progress 001.JPG
    44.3 KB · Views: 108
That's just a shadow in the middle of the flooring, its not discolored or distorted.  Might be from the mirror leaning up in there.  I want to start getting some of my doors back up soon as I can.
 
WOW! Carolyn, that is a lot of work you have taken on and it looks like you are doing it up to a fine standard. Well done, not just for starting it but also for keeping on. When it is all done you will have such personal pride from the many hours of blood, sweat and probably tears ;)
 
You are doing a great job and I am actually getting winded just reading your posts...AND I am a much younger person than you are.  You are very inspiring..
 
I bought silicone to put around the edge of the bathtub to keep water out.  I did the same in our kitchen when I put down the laminate.  Especially in front of the dishwasher and sink, its been down about 4 years with no issues.

While at Home Depot, I looked at some new flooring I've seen people talk about. It's called Allure and is fiberglass.  It is supposed to be waterproof I believe, and they have a variety of designs and colors, I think it would have gone in much easier.  But to late now, so on with this.

The one thing I need is hubbies miter saw for my quarterround.  But its to heavy for me to lift.  That makes me have to cut my mitered corners with a skillsaw or jigsaw, so not as good.  I suppose there is a box and saw out there somewhere I could use, but where??

I can say one thing, I certainly appreciate how much work that the guys do putting this stuff in mobiles.  They earn every dollar and then some.
 
I miscut my last piece so quit last night, its time when you start doing that.  I forgot to match the crosswise stripe, but I can reuse it, it goes around the furnace.  Then the next full piece needs a hole cut to accomodate  a seat belt bolt. I have it marked.  Had my routine nightly call from hubby between 9 and 10 so quit for the night anyway.  Not sure what I can get done today have other things to do.  Also its 45 out and I would like to do some roof sealing today, but its supposed to get 75 so likely won't do any of that till at least noon.

The caulk I used to fill voids where I can't put trim, no it's not perfect, wish it was, is supposed to be tan, but its way to light. This particular laminate has none to match it for filling imperfections.  Hubby suggested I use paintable caulk and take a piece of the flooring and get some paint blended to match it. Since it has different colors it won't be an exact match but it has to be better then this light tan color.
 

Attachments

  • Newest picture of floor 001.JPG
    Newest picture of floor 001.JPG
    75.5 KB · Views: 104

Latest posts

Members online

Forum statistics

Threads
131,981
Posts
1,388,598
Members
137,727
Latest member
Davidomero
Back
Top Bottom