In July 2005 we had the same problem in our Monaco Executive. The kitchen sink drain hose in the slide leaked because it couldn't loop properly. Jerry eventually fixed it by replacing the original connection with a gasoline pump-style swivel hose connection. We have had no more problems in that area. I'm copying what Jerry wrote at the end of the project in October 2005 and attaching his photos.
FIX FOR THE KITCHEN SINK SLIDE-OUT WHITE FLEX DRAIN LINE:
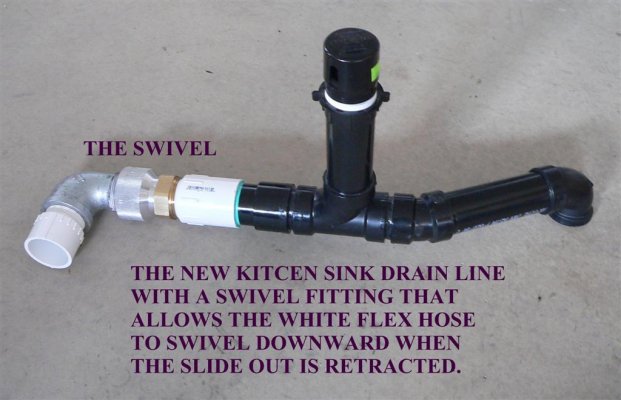
The problem is that when the coaches slide-out is retracted (closed) there is a severe bend on the flexible drain hose. This downward bend sometimes breaks the flexible drain hose. This fix eliminates the sliding track mechanism used by Monaco and replaces it with a swivel fitting so at the point where the white flex hose is being bent it can swivel down when the slide-out is retracted.
There is a very good Brass/Aluminum 1-1/2 inch swivel fitting that only costs $24.00 BUT, take note, the vendor has a $100.00 minimum order. The vendor is EZflo Nozzle & Equipment Company, (626) 967-6284, Gary is who I talked to. The part number is VEZ36S1-1/2 and it is called EZ-flo 1-1/2" Straight Swivel. Their WEB site is: http:/www.ez-flo.com
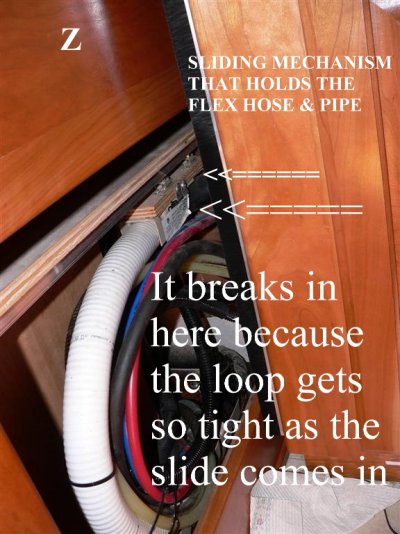
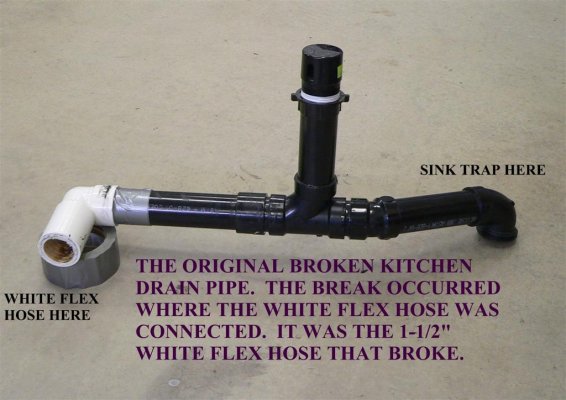
The first photo (Photo 1Z) shows the looped 1-1/2 inch white flexible drain line when the slide is extended. The problem is that when the slide is retracted (closed) the area where the lower arrow is, is where the flex line breaks. This is where it would be nice if the fitting could swivel down 20 to 30 degrees when the slide-out is retracted. The upper arrow points to Monaco's slide mechanism that will be removed.
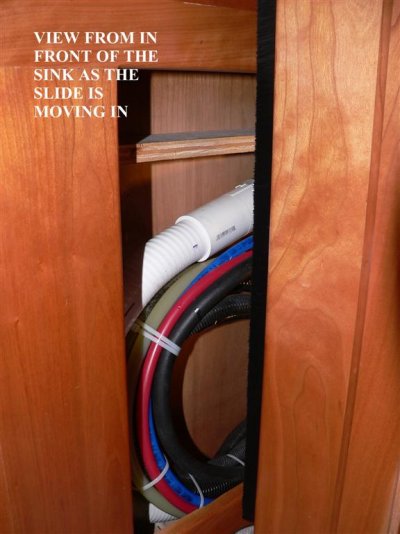
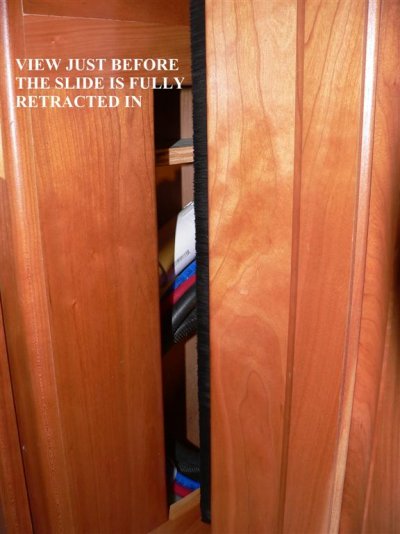
The other five photos describe what to do. As you read this look at the following five photos marked A through E.
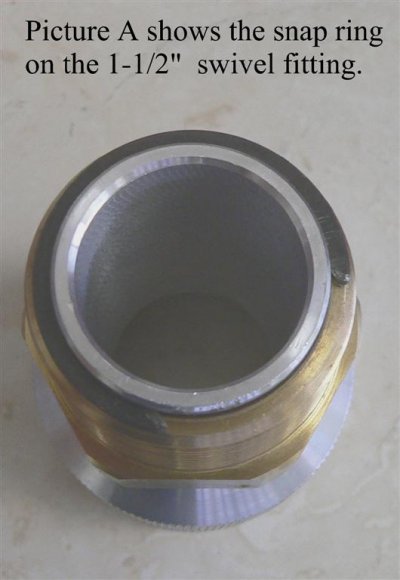
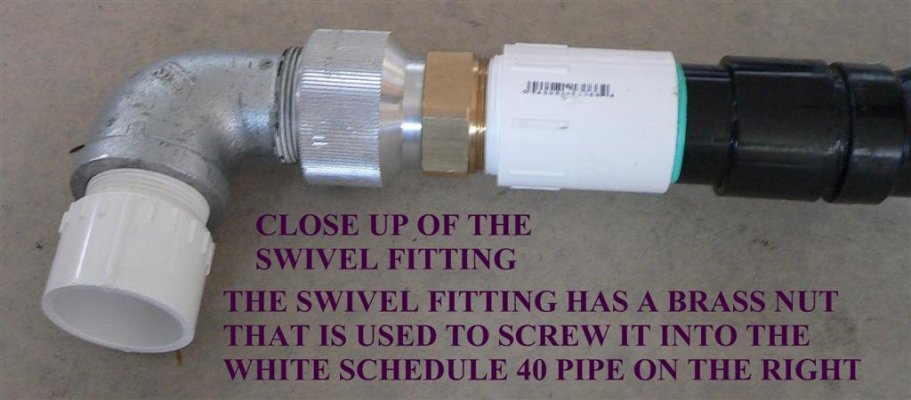
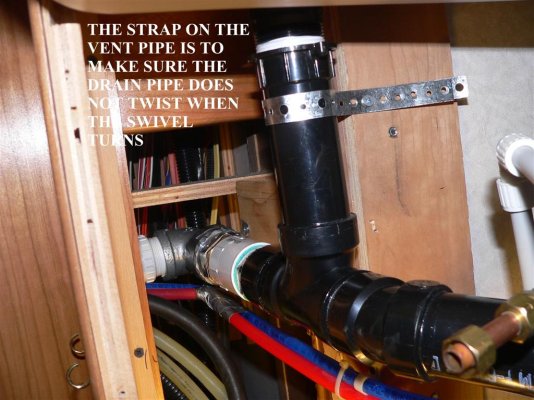
PHOTO A is an end shot that shows the swivel fitting snap ring.
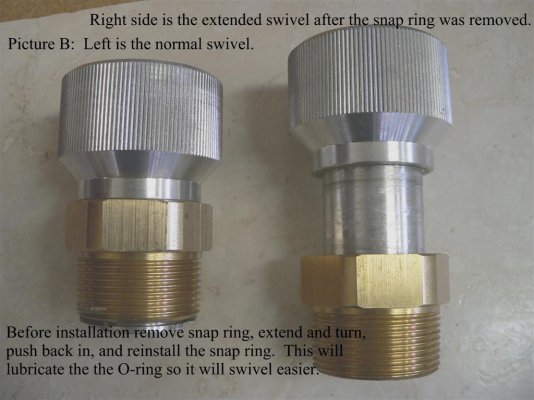
PHOTO B: The left side is the swivel fitting. Before installation you should remove the snap ring and twist and pull the fitting so it is pulled out as shown on the right side of photo B. It will not pull apart so don't be concerned about that. This lubricates the O-ring so it swivels easier. Then twist and push it back together and reinstall the snap ring.
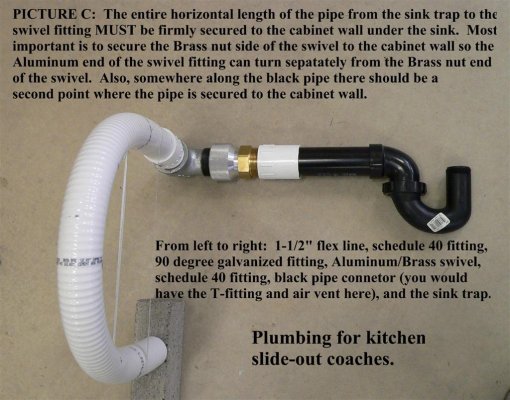
PHOTO C: Shows what the plumbing would look like when the slide is out (extended). Notice that the loop made by the white flex drain line is a LONG loop and there is no downward bending pressure on the flex line where it joins the Schedule 40 fitting because the flex line is going straight out of the Schedule 40 fitting. This is how the flex line looks when the slide-out is extended.
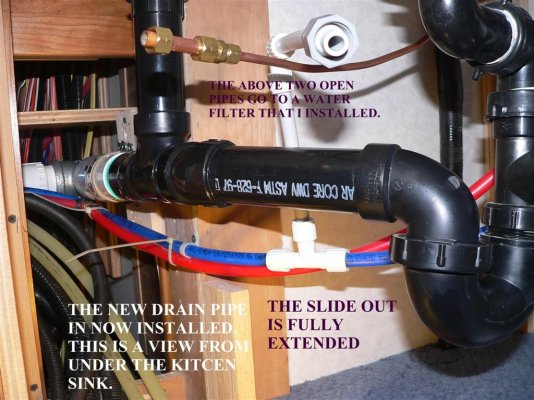
By the way, on my coach I used white Schedule 40 fittings to connect the white flex line because the Schedule 40 fittings have more depth so the flex line can be pushed in further with the cement and it has more surface area for a good bond. The black drain line fittings only have half the depth of a Schedule 40 fitting and therefore poorer bonding. Always use transition cement when you join a white pipe to a black pipe because they are different plastics.
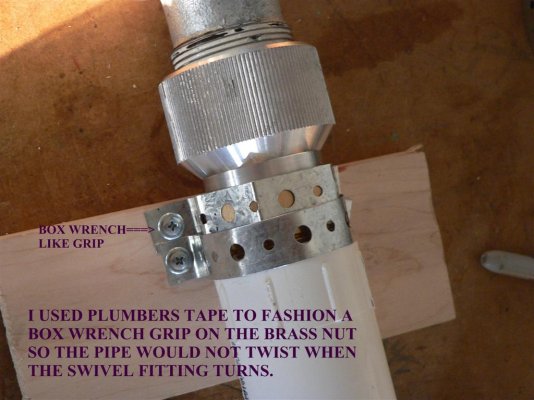
NOTE: For the stability of the drain pipe, the brass nut part of the swivel fitting must be VERY FIRMLY secured to the cabinet under the sink. The securing of the brass nut part of the swivel fitting takes the place of the current sliding-track mechanism. If the brass nut is secured it keeps the black pipe from breaking during movement and it also holds the swivel fitting firm when it swivels downward. You should also secure the black pipe so there are two points secured to
the sink cabinet so there is no twisting motion on this drain pipe.
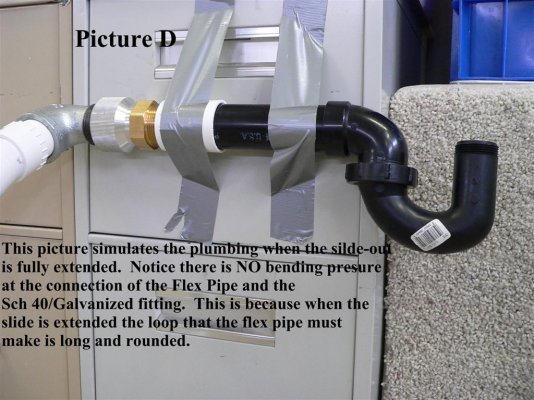
PHOTO D: Like photo C this is the slide-out when extended. Notice that the connection at the flex pipe is level (horizontal to the coach floor). In other words, it goes straight out toward the center of the coach. No problem here because there is no downward bending pressure at the flex line to Schedule 40 fitting.
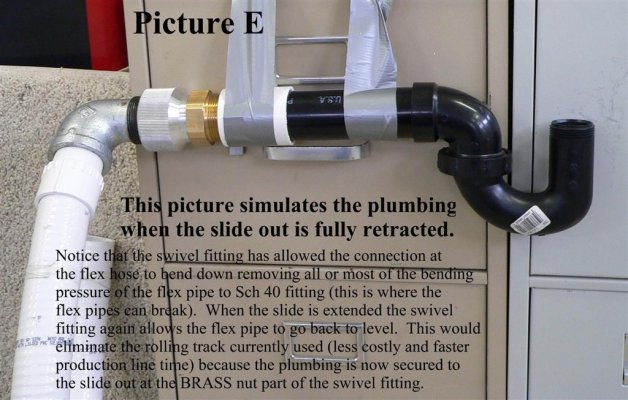
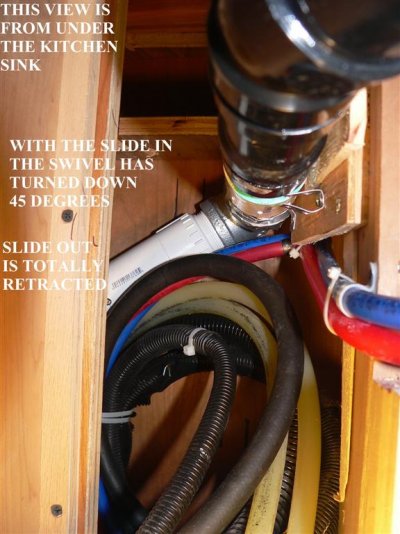
PHOTO E: This is how the plumbing would look when the slide-out is fully retracted. Because there was a swivel fitting, the connection between the flex line and the Schedule 40 fitting has turned down 30 to 40 degrees. This has eliminated the severe downward bending pressure at the junction of the flex line and the Schedule 40 fitting. Then, when the slide out is again extended the flex line to Schedule 40 fitting goes back to level (horizontal to the coaches floor) or straight like that shown in both photos C and D. The swivel fitting allows this movement.
NOTE: Consider using a galvanized or brass 90 degree fitting to connect to the Aluminum end of the swivel fitting because it must be screwed down VERY tightly so the swivel point stays within the swivel fitting itself and does NOT start swiveling where the threads of the 90 degree fitting are screwed into the swivel fitting.
Regarding "screwed down very tightly," as you already know if you screw a plastic fitting VERY tightly into a metal fitting the sharp metal-fittings threads will cut deeply into the plastic and weaken it so it may break in a year or so.
One more reminder, make sure you also secure the black pipe to the sink cabinet framework as well as the brass nut on the swivel fitting so there are two points that are well secured. Do not hinder the movement of the Aluminum side of the swivel fitting.
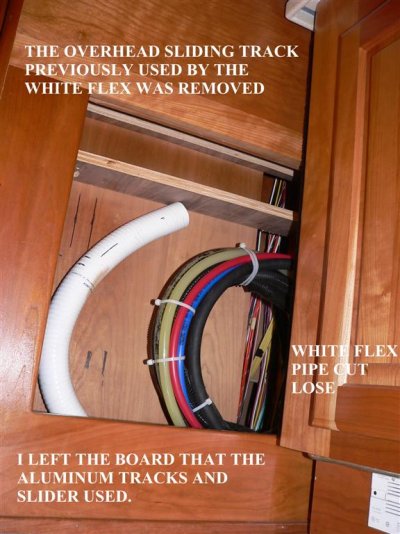
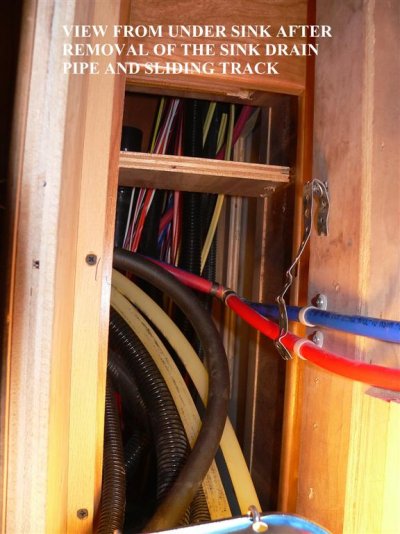
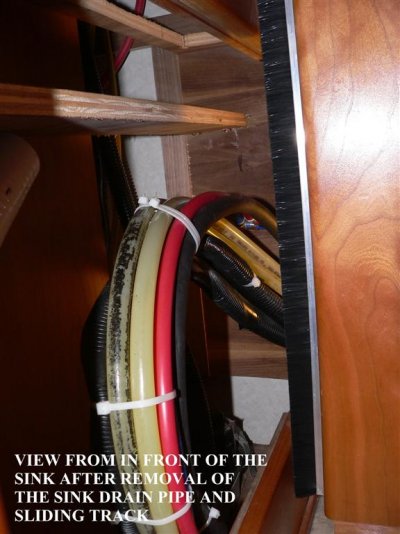
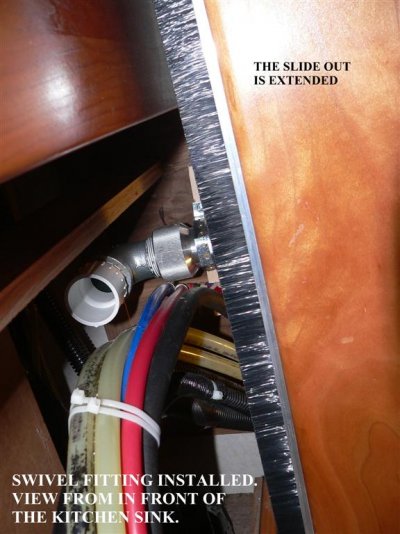
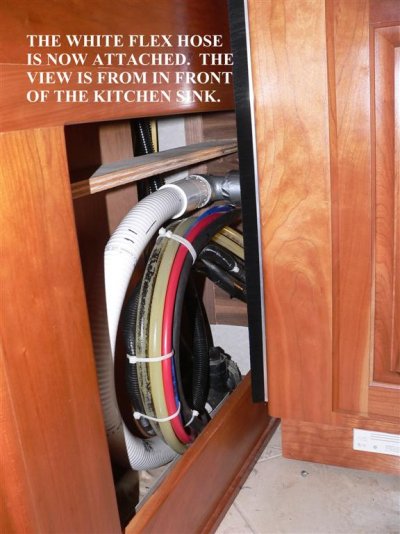
Last but not least, the 14 photos that are named as Z01 through Z14 are the final photos that were taken during the removal of the sliding track that Monaco uses and the install of the modified sink drain pipe with the new swivel fitting.