SargeW
Site Team
My front drivers side slide out has always been a little out of square. The front edge measuring from the coach wall to the edge of the slide out was 25" exactly. The rear edge measured 24 3/8". Both measurements were taken at the bottom edge of the slide floor. That meant that the slide always was just a little off when opening or closing, and when fully open it took the front edge another second to fully seat.
The real issue though was that because of the difference in measurements, the slide topper always sagged quite a bit more on the back end of the slide. That allowed that end flap more in the wind, and hold more water when it rained. So I decided to see if I could square it up.
I went on the HWH site and with a little searching around, I found an adjustment instruction that was pretty simple. Here is a cut and paste of the specific section for the procedure.
ROOM EXTENDED STOP ADJUSTMENT
Make this adjustment if the room is not properly sealed or if the interior trim is not properly positioned when the room is fully extended.
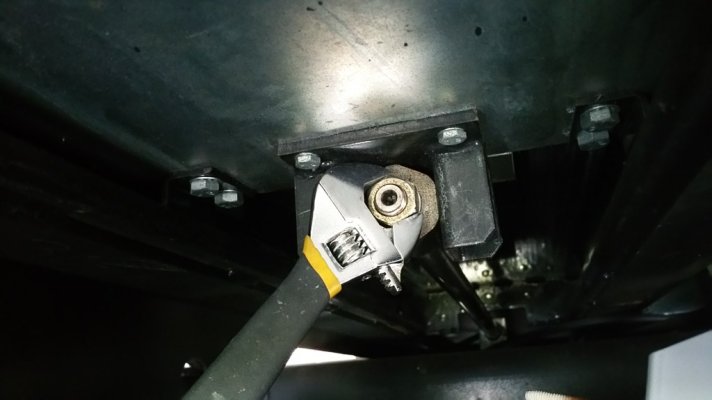
1. Loosen the extended stop jam nut.
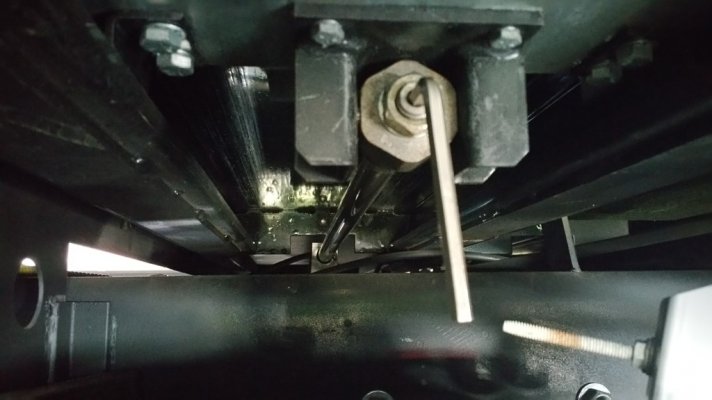
2. Use a 5/16" hex key to turn the cylinder rod clockwise to move the room out or counter clockwise to move the room in.
3. Tighten the extended stop jam nut when the adjustment is complete.
It was just as simple as it sounds, the only difference was that I needed a 1/4" hex key to turn the cylinder rod instead of the 5/16" as listed.
First I loosened the jamb nut. I didn't have a big enough socket with me, so I reverted to a open end wrench. It wasn't too hard, as the nut is not all that tight. A few turns with the wrench and the Jamb nut backs off easily.
Next I had the DW bump the slide in an inch or two to relieve the pressure from the cylinder rod.
Insert the hex key in the end of the cylinder rod, and turn clockwise to extend the slide travel, counter clockwise to reduce travel. I just went a few turns at a time and then had the DW re-extend the slide. After a few adjustments I had both edges of the slide room at 25". The slide room not only moves out smoother than before, the slide top sag was reduced about 50%. The tops will have to be replaced eventually, as weather, rain, and getting caught in a hail storm in Colorado have taken their toll. But for the time being, the flapping is reduced, and the slide movement is smoother.
Don't forget to re-tighten the jamb nut when finished.
The real issue though was that because of the difference in measurements, the slide topper always sagged quite a bit more on the back end of the slide. That allowed that end flap more in the wind, and hold more water when it rained. So I decided to see if I could square it up.
I went on the HWH site and with a little searching around, I found an adjustment instruction that was pretty simple. Here is a cut and paste of the specific section for the procedure.
ROOM EXTENDED STOP ADJUSTMENT
Make this adjustment if the room is not properly sealed or if the interior trim is not properly positioned when the room is fully extended.
1. Loosen the extended stop jam nut.
2. Use a 5/16" hex key to turn the cylinder rod clockwise to move the room out or counter clockwise to move the room in.
3. Tighten the extended stop jam nut when the adjustment is complete.
It was just as simple as it sounds, the only difference was that I needed a 1/4" hex key to turn the cylinder rod instead of the 5/16" as listed.
First I loosened the jamb nut. I didn't have a big enough socket with me, so I reverted to a open end wrench. It wasn't too hard, as the nut is not all that tight. A few turns with the wrench and the Jamb nut backs off easily.
Next I had the DW bump the slide in an inch or two to relieve the pressure from the cylinder rod.
Insert the hex key in the end of the cylinder rod, and turn clockwise to extend the slide travel, counter clockwise to reduce travel. I just went a few turns at a time and then had the DW re-extend the slide. After a few adjustments I had both edges of the slide room at 25". The slide room not only moves out smoother than before, the slide top sag was reduced about 50%. The tops will have to be replaced eventually, as weather, rain, and getting caught in a hail storm in Colorado have taken their toll. But for the time being, the flapping is reduced, and the slide movement is smoother.
Don't forget to re-tighten the jamb nut when finished.