OP
OP
rhmahoney
Well-known member
- Joined
- Feb 9, 2005
- Posts
- 1,405
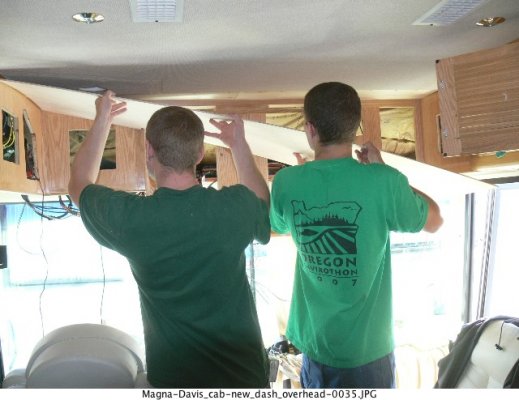
Day 4 Not much progress. The largest wood structure is the floor of the overehead that has the holes for the air ducts, dash radio speakers and map light. This will be reused. They carried it in and out several times, measuring, remeasuring, adding and subtracting wood to get it to match up with the new cabinet faces. After they got that satisfactory, They started the same process all over again with a 1/4 inch sheet of plywood to cover the ceiling 25 inches from the new stuff back to where evidence of construction could not be seen.
Day 5 My appt at Carrier is shifted to next week. The greatly modified wood pieces described above are sent out to Countryside Interiors to get reupholstered with a thin layer of foam and surface of pseudo-leather.
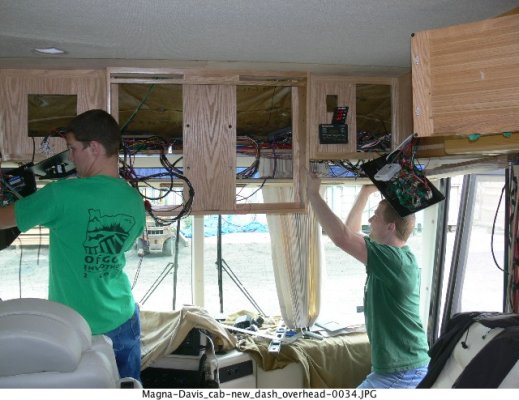
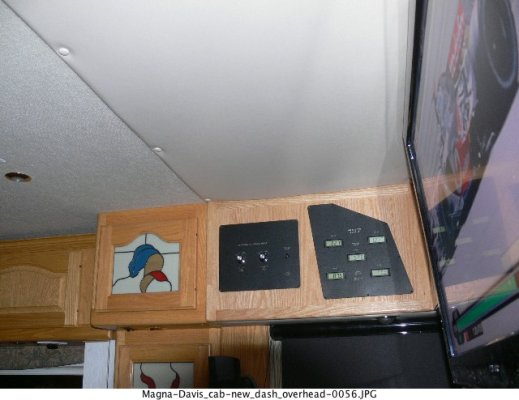
The installer putters about with temporary mounting the display panels and laying out the HDMI, and component audio-video cables.
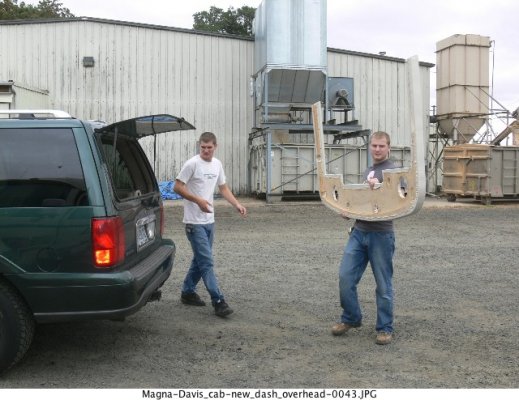
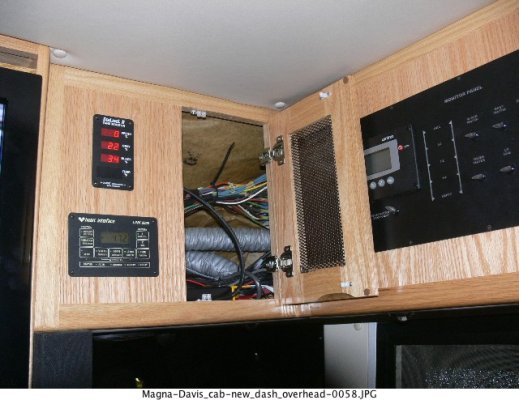
After lunch, the upper dash floor arrives and 2 people shoehorn it into place. Now the rush is on! The bundles of wire get rearranged, circuit boards reinstalled, air handler em-placed and all the octopus arms attached to the outlet vents in the correct holes, dash radio speakers set, map light reattached, blinds screwed down, gauge panels get final reattachment.
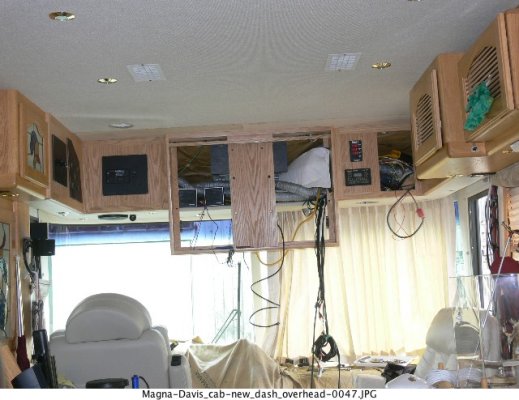
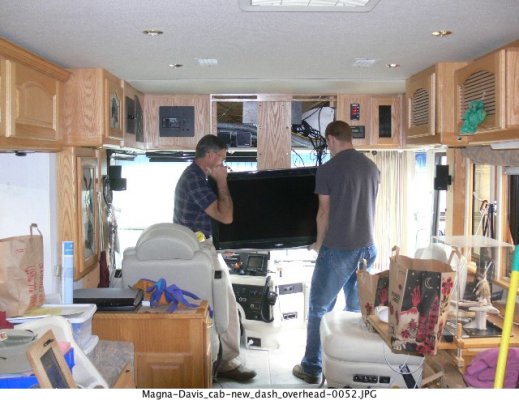
Now it is 5:30 in the afternoon and we are read for the final event...The TV is brought in and installed. It fits the cabinet so closely that the attachment bolts must be tightened to pull it into its final resting place. The HDMI cables are first attached as they are inaccessible later.
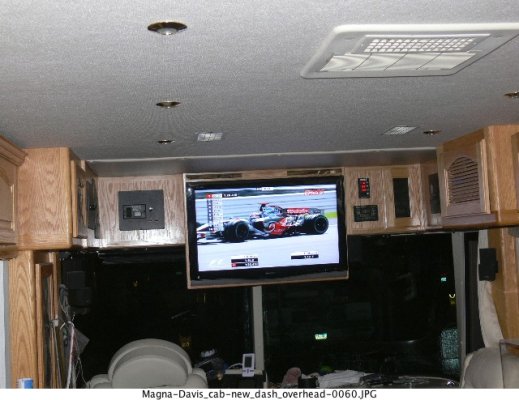
Power up ... It works with Tivo on first try! Over the air HD is crisply clear and detailed with the batwing antenna still flat on the roof.
The installer, Rick Davis (father of Shaun who is over in Redmond manning the shop booth at "the rally""), and I do a rapid clean up, shake hands and we all depart for the weekend...me without paying up!
I will return in 5 days for the delayed appt at Carriers and to have larger electric blinds installed. Unfortunately, Shaun will have the bill ready by then.
After a fuel up, I departed Junction City at 7:15 PM and got over to Newport by 9 PM just as darkness settled in on a drizzly evening.
Sorry about the periods and spaces in the file names, OSX allows it, so I thought no further.
Day 5 My appt at Carrier is shifted to next week. The greatly modified wood pieces described above are sent out to Countryside Interiors to get reupholstered with a thin layer of foam and surface of pseudo-leather.
The installer putters about with temporary mounting the display panels and laying out the HDMI, and component audio-video cables.
After lunch, the upper dash floor arrives and 2 people shoehorn it into place. Now the rush is on! The bundles of wire get rearranged, circuit boards reinstalled, air handler em-placed and all the octopus arms attached to the outlet vents in the correct holes, dash radio speakers set, map light reattached, blinds screwed down, gauge panels get final reattachment.
Now it is 5:30 in the afternoon and we are read for the final event...The TV is brought in and installed. It fits the cabinet so closely that the attachment bolts must be tightened to pull it into its final resting place. The HDMI cables are first attached as they are inaccessible later.
Power up ... It works with Tivo on first try! Over the air HD is crisply clear and detailed with the batwing antenna still flat on the roof.
The installer, Rick Davis (father of Shaun who is over in Redmond manning the shop booth at "the rally""), and I do a rapid clean up, shake hands and we all depart for the weekend...me without paying up!
I will return in 5 days for the delayed appt at Carriers and to have larger electric blinds installed. Unfortunately, Shaun will have the bill ready by then.
After a fuel up, I departed Junction City at 7:15 PM and got over to Newport by 9 PM just as darkness settled in on a drizzly evening.
Sorry about the periods and spaces in the file names, OSX allows it, so I thought no further.
Attachments
-
 1-install-TVcabinet.jpg115.1 KB · Views: 103
 -
 2-test-fit-floor.jpg108.8 KB · Views: 79
 -
 3-test-fit-ceiling.jpg85.6 KB · Views: 71
 -
 4-floor-arrives.jpg113 KB · Views: 68
 -
 5-floor-installed.jpg99 KB · Views: 86
 -
 6-TV-going-in.jpg105 KB · Views: 78
 -
 7-final-result.jpg100.5 KB · Views: 105
 -
 8-right-panel.jpg97.7 KB · Views: 85
 -
 9-left-panel.jpg77.9 KB · Views: 75
 -
 10-access-door-on-rear-of-TV.jpg79.1 KB · Views: 90
")