Norcold to residential fridge project

The friendliest place on the web for anyone with an RV or an interest in RVing!
If you have answers, please help by responding to the unanswered posts.
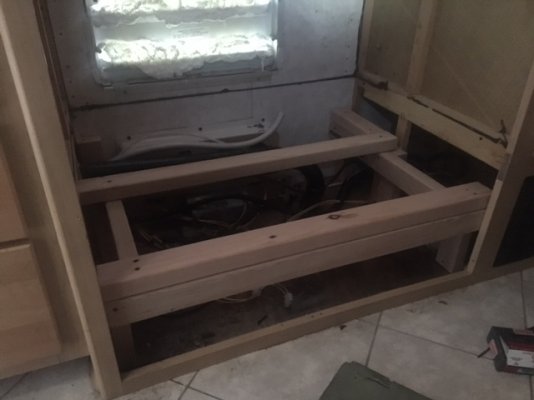
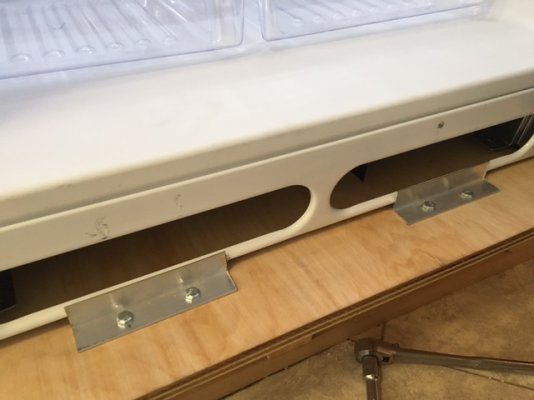
My compressor is also in the back at the bottom.
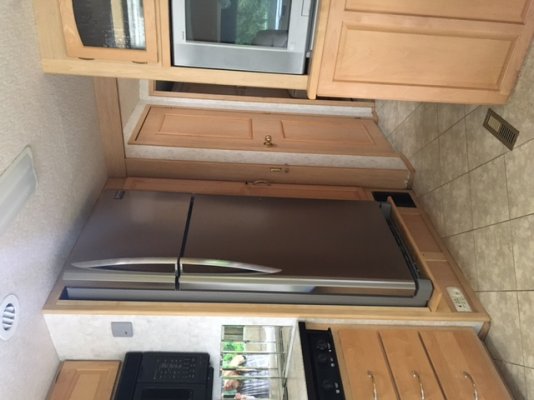
Planning about the same gaps as you John, except the back of the fridge will be fairly close to the wall.
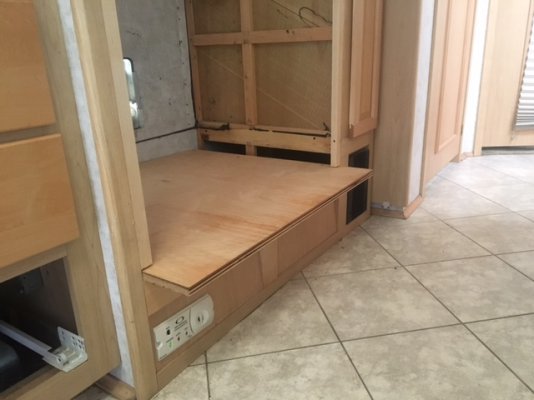
Plenty of ventilation coming up from under the new floor base.

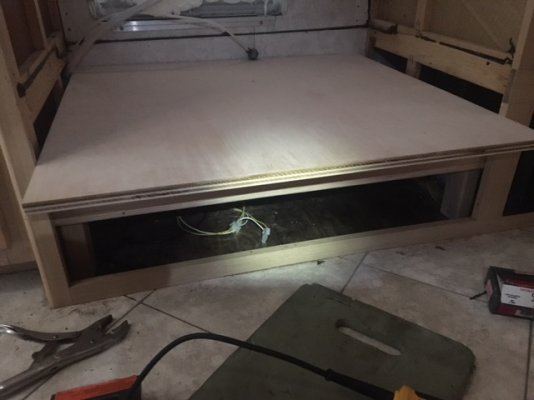
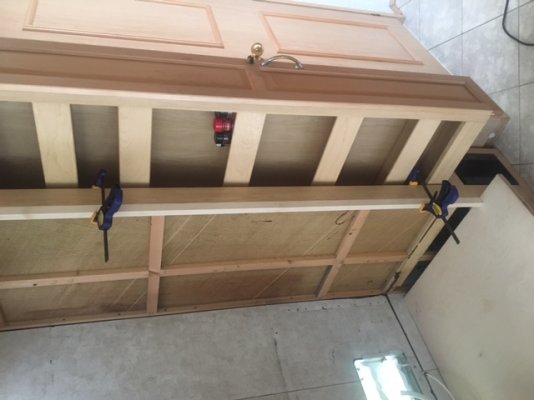
Short break on the project. Fridge will be delivered Tuesday. Just need to cut the front wood trim and build the floor base.
I'm hesitant to proceed further until I have the fridge for actual measurements.
 
Mine can pull air under the bottom front and through holes I drilled in the "floor" of the compartment. I also have 3 small vents in the trim across the top front that are not visible unless you are really tall. I can feel a bit of heat from them sometimes.  (The top trim and right side trim have Velcro and are mounted tight against the fridge. And I did leave the roof vent alone.
 
Fridge delivered by Lowes today. They called this AM to say running late due to early heavy rain, traffic and a full schedule. (Strike one) I said it was going in a motorhome. They replied they never did that before and probably wouldn't be able to but at least would look at it. (Strike two). Arrived an hour later than planned. (Foul ball). I explained what was involved and offered 30 bucks apiece. That got their attention. Took off the doors, and water manifold for the ice maker to squeeze it through. They even put it all back together once inside. No dings or damage. (Home run!) Money well spent. Nice couple of guys.
Thanks to whoever posted suggesting greasing the delivery guys palms. ?
Starting carpentry work tomorrow.
 
BinaryBob said:
...thanks to whoever posted suggesting greasing the delivery guys palms. ..
You're welcome  :D.

You are generous, I gave the Lowe's guys 20 bucks each but I had to reassemble the fridge. Glad that all worked out for you.
 
I thought that was you John, but wasn't sure.
I remember reading 20 bucks, but you've had yours installed for quite a while now.
Inflation.... 
 
Back to work on the project...
Sort of over-built the base framing.
The maple plywood fits perfectly. So far, all measurements are on the nuts..

For those about to tackle this project - I presume all these old Nocolds have the "garden hose" fitting for the ice maker water line.
I was all set to cut the water line, remove the garden hose fitting, and insert a new ferrule and 1/4" brass fitting to attach to the new fridge ice maker solenoid.
On closer examination, you just need to remove the garden hose adapter, leaving the standard size coupling that fits into the new fridge solenoid.
Easy-peezy.

Next step is to have a friend help me hoist the fridge into the opening so I can mark the spots on the platform where I can bolt the fridge in. Then pull it back out so I can drill the securing bolt holes and attach and stain the trim pieces.

Keeping fingers crossed that I haven't missed anything! I'm finding this is not a horribly complex project, but it does require a lot of thinking and planning (at least for me) since no two situations are exactly identical there are no standardized instructions.
 

Attachments

  • IMG_09.JPG
    IMG_09.JPG
    76.6 KB · Views: 40
  • IMG_10.JPG
    IMG_10.JPG
    82.2 KB · Views: 36
BinaryBob said:
Next step is to have a friend help me hoist the fridge into the opening so I can mark the spots on the platform where I can bolt the fridge in. Then pull it back out so I can drill the securing bolt holes and attach and stain the trim pieces.

Can you just sit the fridge on a piece of cardboard and make a template for the base and another piece of cardboard for any other places you need to bolt? Just trying to save some heavy lifting and lessen the possibility of something happening doing the lift twice.
 
Bob, Have you considered insulating the side walls.  It may help keep the frig cooler and there by having to work less and use less battery power if working off the inverter.
 
Looks like you're closing in on completing the project!

I just have screws in my fridge base but there is a block of trim on top of the fridge that keeps it secure. That top trim block keeps the fridge from moving side to side and fire and aft.  So far it has worked fine like this for probably 25,000 miles of travel.
 
kdbgoat said:
Can you just sit the fridge on a piece of cardboard and make a template for the base and another piece of cardboard for any other places you need to bolt? Just trying to save some heavy lifting and lessen the possibility of something happening doing the lift twice.

(Forehead slap...)  Why didn't I think of that!
Thank you
 
kjansen said:
Bob, Have you considered insulating the side walls.  It may help keep the frig cooler and there by having to work less and use less battery power if working off the inverter.

I'll have to look into this Keven.
I'm concerned about proper ventilation. Not sure how much energy this would save but if it helps it's worth it.
 
I'm following your project with keen interest Bob. Not that I need to tackle this myself, but after having my first residential refer in my last rig I am convinced that it was the best change since sliced bread.  Looks like you are doing an excellent job, keep it up!
 
I'm pleased with the results....
#11 & 13 - trim pieces attached to  sides.
#14 finished
I was able to cut the paneling in half for the lower portion. I attached it with Velcro in case I need to access the bottom in the future.
Now just waiting for a couple of beastly mountain men to hoist the fridge in the opening.
Any local takers?  :) :)
 

Attachments

  • IMG_11.JPG
    IMG_11.JPG
    85.1 KB · Views: 37
  • IMG_13.JPG
    IMG_13.JPG
    82.9 KB · Views: 36
  • IMG_14.JPG
    IMG_14.JPG
    90 KB · Views: 40
Our Lowe's carries the banding where they have a small selection of hardwoods. Not sure if HD carries them. I needed some 2" banding for a project and I had to get that off the Internet.

If you find the banding, look to see if they have a little plastic banding trimmer hanging up nearby. It's a neat (and cheap) tool to run along the banding and trim off the excess (the banding is wider than the plywood edge. The alternative is to use a knife of some sort but you have to be really careful when trimming.

Oh, be sure and use plenty of heat to melt the adhesive and check with the boss before using her iron  :).
 
I just stopped by my local Lowes.
They didn't have it but recommended a contractors supply store that has everything needed.
"Holdahl Company"
I'll visit them tomorrow.
 
Took the day off to finish this project.
Found maple edge banding at Menards. (Thanks for that tip).
Also cut some aluminum L angles to help keep the fridge secure. (pic 15)
Overall, very pleased with the results. (pic 16)
We'll see how it holds up on a trip in a couple of weeks.
Couldn't have done it without y'all...... :D
 

Attachments

  • IMG_15.JPG
    IMG_15.JPG
    78.2 KB · Views: 34
  • IMG_16.JPG
    IMG_16.JPG
    97.3 KB · Views: 43
Back
Top Bottom