Painting our RV ourselves?

The friendliest place on the web for anyone with an RV or an interest in RVing!
If you have answers, please help by responding to the unanswered posts.
utahclaimjumper said:
There are ways to take some of the work out of it, I use an air file that reciprocates and does a good job of "blocking" on flat surfaces, but a rotary devise does a poor job.>>>Dan

I am at the stage where i would simply write a check, but a little more detail might save the lady and many other people a lot of aggravation.
 
Another subject not mentioned is the sheeting material,, if its aluminium it probably is corroded under the present paint, if you see what looks like little "worms" under the paint these will have to be removed and the sheet treated and filled or you will be wasting your money and time.. On the other hand if the present paint is "tight" and not flaking or peeling, the you can just scuff it with #400 wet & dry  and spray away.  Be sure to carefully remove ALL wax residue with Prepsol or equivalent before you begin any sanding, otherwise you will rub the wax or silicon onto the surface and  the new paint won't like it. (and nether will you)>>>Dan
 
Many years ago, I painted our 16' Shasta travel trailer with a roller. It turned out surprisingly well. And years later it still looked good. The roller gave it an egg shell texture, but was still quite smooth and shiney. Use a good quality paint that self levels. Brush the edges and then roll as close as possible to those edges. No special equipment required and you will be pleased with the result. It won't look like a show car, but will still look good. Temperature is important. The paint needs time to level so can't be too warm.

I will be painting ours this coming Spring when the weather warms, but we have all the proper spray equipment so I'll be spraying this time around. But if I didn't have it, I wouldn't hestitate to use brush and roller, again. Check out some of the Marine paints. They are excellent at leveling and giving a smooth finish with brush or roller. Try it on some sample material first. To scuff the surface, try Scotch Brite pads instead of sand paper. Take the sheen off then clean thoroughly with a good surface prep cleaner and lint free cloth. These are available at any automotive paint shop.
 
Hi Natasha...I just wanted to offer you a little advice on this repaint project. I completely repainted my '88 32 ft. Itasca Windcruiser a few years back. It was quite a job and took a lot of labor, time and money to finish. At the time, I had my own shop, a 10,000 sq. ft bldg with compressors, air lines and a spray booth. Although I could not fit the motorhome into the spray booth, it was very instrumental in helping me to exhaust the paint fumes.
I would estimate that the entire paint job (not including my labor) cost me about $1300.00. This included all of the paint materials, both primers and finish colors, and all of the materials necessary to get the motorhome ready to paint. There is a tremendous amount of work to do prior to applying the first coat of paint. My guess is that I probably spent 60 to 70 hours prepping the coach. I only had help on removing and reinstalling the awning.
My suggestions would be:
1. Be darned sure that you are willing and capable of tackling a job like this.
2. Take some photos and do some color layouts so that you know exactly what you want the coach to look like before you start.
3. Remove everything that comes off of the motorhome prior to beginning ie: awnings, lights, ladder, etc.
4. Repair every little crack or flaw in the coach prior to painting. Use a professional if necessary.
5. Have an enclosed dust-free area to mask, prep and paint.
6. Use only the best paints (epoxy-based polyurethanes or equal) and thinners.
7. Make sure that your compressor is large enough to supply the necessary air for the duration.
8. Paint the coach in sections ie: Front, thenrear, then left side, etc. If you can set up a long plank on a couple of ladders to do the sides, it will    make it much easier than moving a ladder and climbing it for each pass.
9. Have fun and take lots of pictures.
Steve

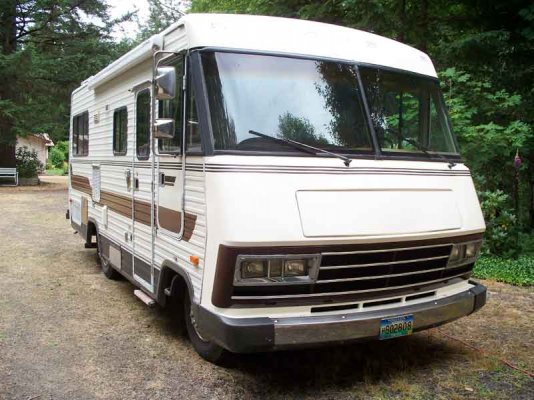
                                   
 
I?ve painted a few cars and small trucks in my garage and front driveway. Now I have a 28ft class C and I?m ready to paint it. The prep is the most  time consuming part. The strip removal was the worst.
Start of:
1. Good wash with bleach to kill the mold
2. Remove strips with heat gun and a product called  vinyl off
3. Sand vehicle with 320 wet ? dry sand paper
4. Repair any damage to the surface and sand that area.
5. Wipe vehicle down with paint thinner
6. Paint vehicle
7. Your done, about a month or two later,
There is a paint shop on line TCP Global http://www.tcpglobal.com/restorationshop/rspssurethane.aspx the sell Single Stage Acrylic Urethane for about $75.00 per gal. I figure about 2 gallons it comes as a kit for $149.00 for the 2 gal.
The vinyl off web site http://www.crystaltek.us.com/crystaltek-vinyl-off.htm
Vinyl Patriotic Decals/Stickers sits http://www.freakdecals.com/index.asp?category=21544
REFLECTIVE TAPE STORE http://www.colebrothers.com/reflective/index2.html
Good Luck
Carl
 
To me one of the neatest things about RVing is that RVing is an equalizer.  Our first MH was old and we felt like the Beverly Hill Billys.  Parked next to a $1M plus Provost we really felt like white trash.  But you know what; NOBODY CARED!

If the RV is rusting and you want to stop it paint it.  But don't waste your time otherwise.  You care about it far more than anyone else!

If you do decide to paint it. try the roller.  I have seen it done and it AIN'T ALL THAT BAD!
 
Hello natasha,
I am looking at painting my RV myself, just curious to know if you ended up painting yours and if so how did it come out?
Regards
robert
 
orionn1 said:
Hello natasha,
I am looking at painting my RV myself, just curious to know if you ended up painting yours and if so how did it come out?
Regards
robert

I'm not Natasha, but, for what it's worth, I did paint ours (end caps and side stripes) with Rustoleum Marine paint using a 4" foam roller, two coats. I've seen spray jobs that look worse (mine). I did not tip it off with a brush and it still leveled to a reasonably smooth, shiney finish. I will say that going on, it looked terrible. Tiny bubbles and rough looking. But it quickly leveled off to a smooth finish. I'm very happy with the result.
 

Attachments

  • 100_3067.jpg
    100_3067.jpg
    45.4 KB · Views: 89
Gary RV Roamer said:
Heck, you could sand it and paint it with a brush if you want. Won't look like the factory finish, but a modern,top quality, semi-gloss paint will flow out nicely even when brushed.

In '57 I bought a used '47 plymouth for $125.00 from a shipmate - and painted it in the Norfolk, VA city park. My ship and I were stationed at the Destroyer docks and as an enlisted just out of bootcamp, was otherwise stranded.

I bought a gallon of blue house paint and a 4 inch brush at Sears. It appeared the original color was blue, but wasn't quite sure. :(  It was getting chilly by the time I got to the right rear fender (I started on the left, moved forward and around) and by then the paint was beginning to thicken quite a bit. Hadn't thought to buy any thinner. So the right rear was much more streaky then the left.

In terms of effectiveness, I have never been happier with or more proud of a car. The next day I hocked my Argus C3 camera again for $10.00 (I hocked it about once a month). A buddy and I then drove to Virgina Beach, picked up a couple of neat young ladies - and spent the evening doing what young sailors do with a freshly painted '47 plymouth and $10 bucks in their pocket.

So the steps involved were:

1. Buy paint and brush.
2. Drive to park.
3. Paint the Plymouth.
 
picked up a couple of neat young ladies

If you are trying to claim this as a "mini-rally" remember the "photo" requirement.  Very convenient that your camera was hocked the day before.  You Swabbies ;D
 
Just curious, why is all the sanding required?  I can understand initial sanding to get old "paint finishes" off and have rough material for paint to adhere but are subsequent sanding required?  Paint these days have additives with excellent adherence properties and when used together with a compatible primer, the paint's adherence properties are enhanced.  Why all the subsequent sanding?
 
You've gotten a lot of valuable information on how to do an outsanding job and make it look as good as new.  We haven't seen what you have, not understand what your expectations are.  I painted a Ford Falcon (remember them) many years ago and used a brush and a gallon of paint from Wal*Mart.  It looked much better than it did before and lasted another couple of years before going to live at a junk yard.  It was a good deal for me but certainly would not have satisfied anybody looking for perfection or to make it pristine.  It wasn't before and it wasn't afterwards.
 
COMer. it wemt to live at the jukyard?  Is that whatt they told you?  Ever have a puppy they took to 'live at the farm'? 

 
Funny you should ask.  Do you know anything about that farm?  I've looked and looked.
 
I had a old GMC van, can't remember the year but it had to be early because I painted it in the early 70's. I used spray cans. I started with like 20 of them and ended up going back a couple of times to get more. ended up with like 50 to 60 cans,  Back then it wasn't but like .50 cents a can or less. I'm sure it looked like crap but to me it was beautiful. then Got to add all the shag carpet and hippie beads inside
 
Back
Top Bottom