The Sequence of Blowing Out Water Lines - How Important Is It?

The friendliest place on the web for anyone with an RV or an interest in RVing!
If you have answers, please help by responding to the unanswered posts.

steelmooch

Well-known member
Joined
Aug 5, 2010
Posts
280
Hello, all...and thanks for your time and consideration.  :)

Though we've been travel trailer camping for 4 years now and been fortunate enough to log some healthy miles for weekend warriors/park-timers...this is our first time really "winterizing" for the northeast winter.  For reference, we're set to winterize a 2019 Winnebago Minnie travel trailer. 

(We used a temp-controlled, underground limestone mine up until now.) 

I have the fancy city water plug adapter, and I'll be using a 20V DeWalt air inflator (with max PSI setting) to attempt my water line blow-out. 

I'm seeing different "sequence" suggestions online, and I don't know if it's a preference thing...or actually important...to do it one way or the other. 

I've seen it suggested that I open up the water tank heater on the outside of the camper first, and let it drain/drip until empty.  Then get the compressor going, and it should push even more water out of the hot water tank via the outside plug.  Then close up the water heater and pressurize/do the rest of the lines, before finally removing the hot water tank plug and leaving it off for the winter. 

I've also seen it suggested that I should NOT do anything with the hot water tank until all of the other water lines are blown clear.  Does this suggest that the water heater is the "low" point, and that water from the sink/shower lines would reflux back into the water heater if it's vacated first? 

Not sure if this matters or not...any recommendations greatly appreciated...especially if it helps me to understand why I'm doing what I'm doing. 
 
If you have a heater bypass, bypass the heater open the pressure valve on the heater remove the plug and drain the heater.  Open the valve on the on board tank.  Set the air compressor to 40 psi and open the hot than cold on the outside shower till you get air, also step on the toilet till you get air, do this to all the other faucets and the low water drain.  than you will put rv antifreeze in the p traps for the shower and sinks. you should be good to go.
 
That compressor you have will not work IMHO.  You need a compressor with some volume. Just for a test, start that compressor and open the air hose. See how much constant air flow you get out of it. Then let it build up with pressure till it shuts off. Then open the air line and see how much air you get out of it. You won't get much air. You need quite a bit of air to blow out the lines especially if you have any low points in the lines. Now when you do get a decent air compressor, like it was said earlier, go around and open the faucets ONE at a time and let the air blow out until there is no more water coming out then shut that faucet. Then let the compressor build up air again then open another faucet.  Do this to all the faucets, like I said one at a time.  If you feel like there is no more water, do it all over again.  Don't forget these if you have them: outside shower, washer valves and fridge ice maker.
 
As mentioned, "top to bottom" is the sequence to think about. The hot water tank is not that big of an issue, as long as you empty it and use the bypass valves on the back side to skip it from the "blowing air" sequence after that. It doesn't matter if there is some residual water left in the HW tank... even if it freezes, a little water on the bottom won't expand enough to do any damage.

I agree with Rene that a battery powered inflating tool probably won't do the job. Or if it does, it would take a really long time to build up pressure in your system between blowing out each faucet. With a "real" compressor, the pressure is constant enough to just keep on blowing as you work your way around the faucets and exterior drains. Last year (and probably this year since my home compressor won't currently hold pressure) I used the air hose at my small town gas station. Hooked it up to my water line adapter, and worked my way around the rig a few times. Took about 15 minutes. Since that hose seemed to have a pretty high PSI that I couldn't control, I kept a faucet open at all times with no more than a few seconds in between, to prevent any plumbing lines from being damaged by the high airflow.
 
How I did it: Drain the tank, then operate bypass then blow gabriel blow
How Rachel (The RV-GIRL) does it) she used a siphon hose while on the heater while blowing...

I"m not sure it matters so long as you get most all the water out  A cup or two in the bottom won't damage it .
 
I see no need to "blow" air through the water heater tank - just empty it and then bypass. Open a hot water faucet to let the tank drain more easily, but even that is just a time-saver.
 
If you have a water pump, might want to get some of the "pink" RV antifreeze and use the pump to fill the lines and traps after you drain the HW heater.  Close the bypass so you don't try to fill the HW heater with antifreeze.  Ours takes less than 2 gallons to winterize a DP MH.  There are some misc drains that need to be opened before the antifreeze and the main water tank of course as well as the gray/blk tanks.  For us the fridge ice maker is easy to forget.
 
That is how I do it. The important thing is to close the bypass, I forgot once and wasted a gallon of anti freeze before I realized what was going on.  ::)
 
taoshum said:
If you have a water pump, might want to get some of the "pink" RV antifreeze and use the pump to fill the lines and traps after you drain the HW heater.  Close the bypass so you don't try to fill the HW heater with antifreeze.  Ours takes less than 2 gallons to winterize a DP MH.  There are some misc drains that need to be opened before the antifreeze and the main water tank of course as well as the gray/blk tanks.  For us the fridge ice maker is easy to forget.

I think the OP only wants to do the air method. NO pink stuff.
 
My method, thanks to this Forum:
1.  Gravity drain everything that will drain.  Water heater, fresh tank, open low point drains, all faucets.
2.  Close everything but water heater.  Replace plug, but do not tighten.  Bypass WH.
3.  The blow down requires VOLUME to clear the lines.  A tank compressor is really required.
4.  Run the pump dry or run a quart of pink into the pump.
5.  Install the blow plug in the city water fitting.  Connect compressor.  Open each faucet, hot and cold separately, and allow to drain completely.  Remember toilet, ice maker, washer, outside faucets, low point drain, everything.
6.  Once everything has been blown empty, repeat the procedure.  Air can push water into previously drained lines when others are opened.
7.  Pink stuff into all traps.
8.  DONE
 
One thing I use to do is while going home after the last camping trip of the season, I would open all the faucets and both low point drains. While traveling home all the water, for the most part, would find itself to the low point drains. I also opened then water heater drain and left it open till we got home.
 
Two minor steps to add that I learned here somewhere.

Temporarily remove the inlet water screen prior to attaching the compressor to the water line

As the last step, run the water pump for 2 seconds, then unscrew and empty the water pump strainer filter bowl
 
If you have a builtin water filter, when done, remove the screw on tank and leave off, or at least pull the filter.  I forgot to one year, ar had blown thru, but water in filter cracked the tank.

Now I go south.
 
PancakeBill said:
If you have a builtin water filter, when done, remove the screw on tank and leave off, or at least pull the filter.  I forgot to one year, ar had blown thru, but water in filter cracked the tank.

Now I go south.

Unfortunately some of us need to prepare BEFORE we go south. :(
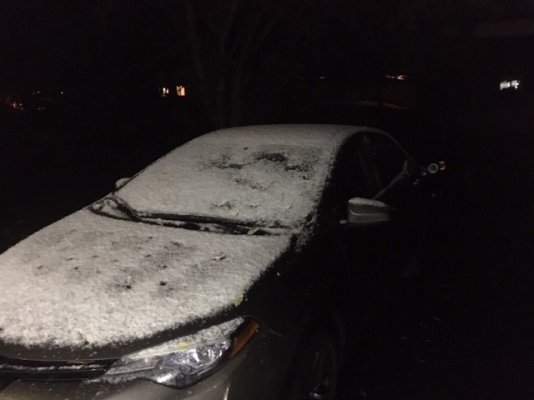
Just took this pic tonight here in MN.


Attachments

  • 10112019.jpg
    10112019.jpg
    49.7 KB · Views: 33
Gary RV_Wizard said:
I see no need to "blow" air through the water heater tank - just empty it and then bypass. Open a hot water faucet to let the tank drain more easily, but even that is just a time-saver.

The water line between the bypass valve and the water heater tank will need to be blown dry. So a short burst to the tank is necessary.

 
I don't see why that needs to be dry, but I'll take your word for it.  Water in places that can expand freely is not a problem.  As long as the water is in a space where expansion is possible, freezing is a non-issue.
 
Back
Top Bottom