RV Toilet flange. Help

The friendliest place on the web for anyone with an RV or an interest in RVing!
If you have answers, please help by responding to the unanswered posts.

dcook3333

Member
Joined
Jul 5, 2021
Posts
9
Location
Pittsburgh, PA
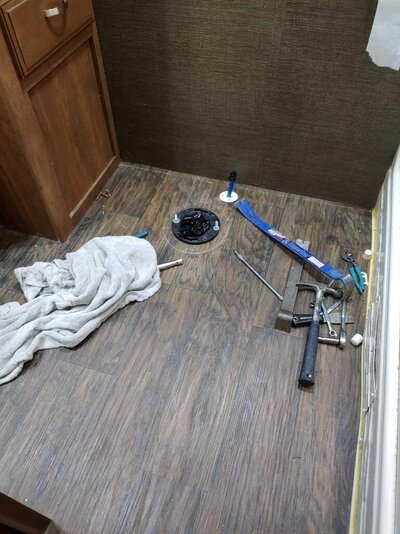
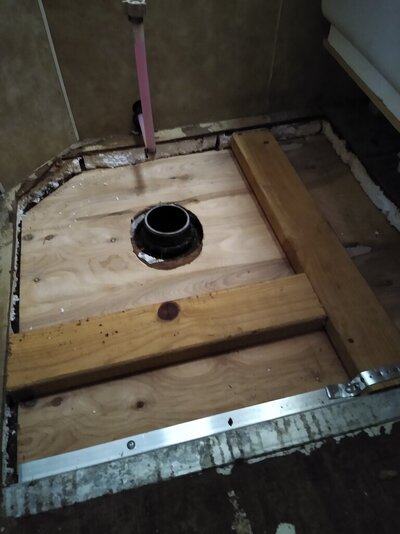
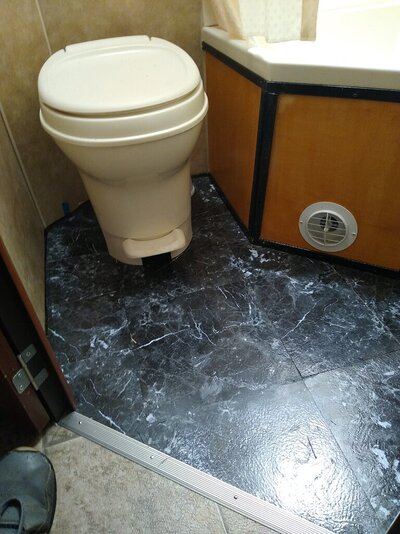
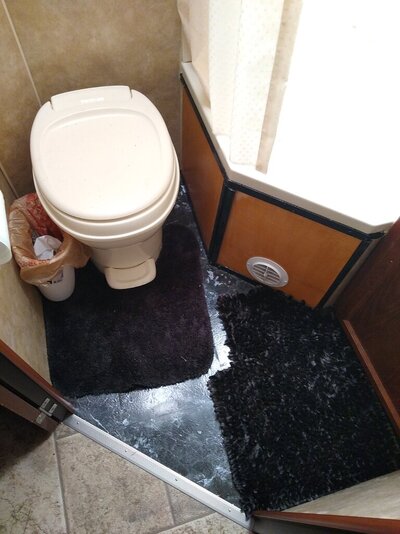
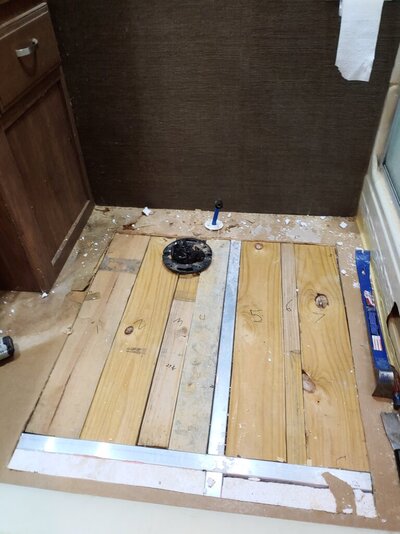
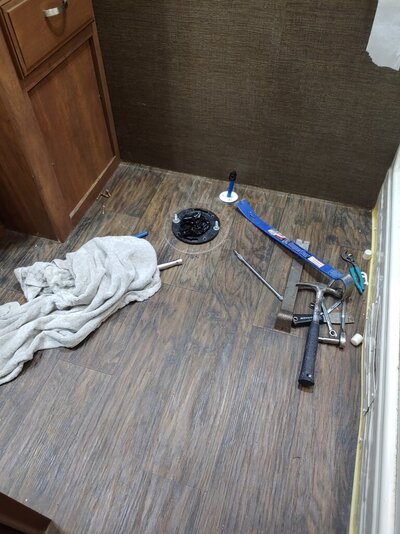
Hi, I need to replace a piece of the floor in my 2015 Laredo. Looks like it must have gotten wet for previous owner. The toilet flange is not disconnecting. Nibco 5851 4x3 flange. I've put some good hits on it to try and get it to turn. No luck. I can pull it up off the floor a bit. Now i'm thinking about working around it but then I'd have to find something stronger than wood to fill in around it. I'm stuck. And thank you.
 
More than likely glued to the pipe. If it were me I would cut a piece of wood to fit, then saw it in half. Finish by cutting a round hole to fit around the pipe. Before installing it I would add a 2x2 where the joint will go to reinforce the seam. Lots of glue and screws and it should be good for ever.
 
A friend of mine had to remove his flange. It was glued to a piece of pipe but that pipe was screwed into a flange on top of the tank.
Can you get to the top of the tank to see if there are threads on the pipe?
 
donn we're thinking the same. Think I'm going to work around it.

Pic attached. There is a cross brace just to the rear of the flange and the next is just a few inches from the door (36in I believe). The floor is 2 pieces of 3/8 wood with an inch of styrofoam sandwiched in between.

The area to the front of the flange is soft - needs replaced. For clearance (the tank is underneath the soft spot), I don't think I can do exactly as you describe. I'm thinking of ripping a 2x4 down to the exact floor thickness from metal brace to brace and using 4 pieces. One at each edge of the repair and one on each side of the flange with metal tabs screwed underneath to help support the adjoining floors. Then fill in the gaps with subfloor and screw it all together. May take a belt sander and levelling compound to make it smooth on top, but... this is something I definitely do not want to do twice.
 

Attachments

  • thumbnail.jpg
    thumbnail.jpg
    176.5 KB · Views: 29
I wanted to make a drawing to explain (and later will use to measure stuff)
The black tank is underneath most of the soft area so I have limited room underneath right there.
 

Attachments

  • rvfloor.png
    rvfloor.png
    11.8 KB · Views: 17
Do you intend to remove all 3 layers of the existing floor in the bad area or just the top layer? Are you thinking to extend the 2X4 strips to where the ends sit on the red floor supports in the drawing? I am thinking that once you remove the section of the floor you will then be able to see the black tank and know more about the way that flange is connected and if it is glued fast.
 
The red is actually the cut I want to make on the center of the steel cross-brace. I have the belly cover dropped down some and can see from underneath. At this point, I'm fairly certain that it's glued fast from looking up the flange online and the force I put into unsuccessfully unscrewing it. Though trying to remove just the top layer is a great idea, Kirk. Perhaps I could embed some angle steel into the styrofoam instead of cutting away all 3 layers. Then the bottom layer would help support the adjoining uncut layer and make for a simpler job. I can try cutting just that top 3/8 piece and see where I'm at. I can always reset the circular saw depth and go deeper. Going to be styrofoam everywhere! Great idea though.
 
Thank you. The updates are fast & furious now but... time to step back and take a break and adjust. Found the aluminum supports as shown. The cut is a rectangle... I just left a part of the board glued to the styrofoam cause.... I think I got to remove the styrofoam anyway. Remember that the cut begins and ends (top and bottom of photo) at a steel truss underneath all 3 layers, so I got that going for me.. Could even drill down and put screw through. To the left, I'm not yet close to the next aluminum piece. The green lines show where the steel is underneath. The red oval is the smushy spot. Obviously, the lower layer beneath the styrofoam is damaged. Perhaps remove that whole section down to the underneath but... I need to be careful as the black tank is underneath that area.
 

Attachments

  • rvfloor2.png
    rvfloor2.png
    932.9 KB · Views: 24
They are often glued. I used my handy dandy dremel to cut in and then hammer and narrow chisel to cut away the pieces. You need to be VERY VERY careful doing that not to cut into the standpipe Finally slathered on glue and a new flange.
 
just went through this a few months ago. Came out pretty good in the end. filled the spaces with foam, added some strength with 2x4's and some bracing with smaller wood around flange area. then REAL plywood over everything. I got some aluminum at Home Depot and drilled a few holes in the existing aluminum stringer, then cut to size and attached the 90 degree piece I bought, creating a "shelf" for the new 2x4's to sit on. This gives the floor a much stronger foundation.
 

Attachments

  • canper (1).jpg
    canper (1).jpg
    93.8 KB · Views: 21
  • canper (2).jpg
    canper (2).jpg
    147.1 KB · Views: 20
  • canper (3).jpg
    canper (3).jpg
    89 KB · Views: 20
  • canper (4).jpg
    canper (4).jpg
    85.3 KB · Views: 18
Waiting for the heat to tone down. Maybe tomorrow. Plus I got an adapter so that I could plug my camper into my welder plug and should be able to run the A/C. That comes today.
@OldMarine. That is impressive. Similar fix. In the places where I will be affixing 2x4s to the aluminum... I was just going to drill and screw right through the aluminum. Going to go with solid wood across as the lowest layer at the bottom is bad and... 1) It is right above the black tank so it's a risky cut and 2) it includes the waterproof membrane over the bottom of the floor which would then be cut. I know that is overkill but given the cuts I made not knowing where the aluminum was and the fact that I'll be compensating for not replacing the 3/8 plywood layer on the very bottom. So I will have a thinner structural floor but solid.
 
Make sure that welder outlet has 4 pins so it has a neutral leg as well as a safety ground.
We think alike. It's only 3 pins, but I am going to run the 4th wire to the safety ground on a neighboring outlet. So using the load wires of the 220/50amp circuit, I will get 110/50amp with safety ground.
 
That is impressive! Was yours the 3 layer floor as dcook333 is dealing with? The only RV floor that I've had to replace was on a travel trailer next to the door where the frame had leaked and it was a single layer and far less complicated.
..thanks Kirk, coming from you that really means a lot. yes, it was 3 layers I believe. I got lucky though. I only had one soft area about the size of a small pizza,(..mmmm..now I want pizza!), so I decided not to rip up the whole floor and have to pull out the shower and sink. Did peel & stick tiles to finish it off.
 

Attachments

  • IMG_20210707_133239920.jpg
    IMG_20210707_133239920.jpg
    175.2 KB · Views: 12
  • IMG_20210707_133346894.jpg
    IMG_20210707_133346894.jpg
    130.2 KB · Views: 12
I'd forgotten to close out this thread. In the end it was pretty simple fix. the floor was quarter inch plywood at the bottom with the covering glued to its bottom, then 1.5 inch of styrofoam in between aluminum supports, covered by another sheet of quarter inch plywood, then the vinyl.

So I basically left the lower plywood intact though it was bad to preserve the under covering's integrity, replaced the 1.5 inches of styrofoam with solid wood I had lying around from other projects, then new plywood on top. Re-rolled the existing vinyl out and used quarter-round trim to make it look half decent.
In fact, it looks exactly like what it started out as (above).

If there was one thing I'd do different, it would be to locate the aluminum supports ahead of cutting the top layer of plywood. I would have made the cuts a bit different had I done that, but I worked it out.
 

Attachments

  • 20210710_130930.jpg
    20210710_130930.jpg
    125 KB · Views: 10
  • Message_1625505015326.jpg
    Message_1625505015326.jpg
    178.1 KB · Views: 10

Forum statistics

Threads
131,981
Posts
1,388,594
Members
137,727
Latest member
Davidomero
Back
Top Bottom