Smoke and Fire After Plugging In

The friendliest place on the web for anyone with an RV or an interest in RVing!
If you have answers, please help by responding to the unanswered posts.
Isaac-1 said:
I guess the question we should all ask:

Is there a better quality 50 amp RV plug out there than the cheaply built yellow Camco plugs?  I replaced one last year on my coach and was not impressed about the en-cheapening of the Camco plug I installed vs the only slightly better looking Camco plug it replaced.
All of the 50 amp plugs I have seen use screw terminals. A molded cord is a much better solution. Not an area to save money by going cheap on the plug.
 
Everything is a compromise.  The average RVer isn't going to have the dies and punch needed to install a large gauge crimped on plug, so screw terminals it is for the replacement plugs.

Of course, you could spend a couple hundred dollars and replace the whole power cord with a new one with a molded on plug, but then you have the problem of connecting the new cord to the screw terminals inside the RV.

Or get the Marinco connector that lets you detach the cord from the RV, it's cord comes with molded plugs.  But make sure you tighten the screw connections on the wall socket properly.

I guess you just can't win.
 
My point above was that not all screw terminals and strain reliefs are equal.  Some screw terminals have captive blind holes, others rely on pinching between metal brackets on the blade. 
 
And the thing to remember, even if you feel like you've tightened them down to the correct torque when installing them, they will most likely loosen up a bit over time.  So my advice is to take the plug/recept. apart after using the new install several times and check all connections.  Many times you will be able to get another 1/4 - 1/2 turn on them.
 
Isaac-1 said:
My point above was that not all screw terminals and strain reliefs are equal.  Some screw terminals have captive blind holes, others rely on pinching between metal brackets on the blade.
But both types are prone to being shaken loose while traveling down the highway. No chance of that happening with a molded plug.
 
i have two 50 amp plugs The one that is IN SERVICE and the one I put on the end of the cord years ago when I cut off a coupler feet to use as part of an Autoformer Install.

In my case it was a HOT lead that came out of the bracket.

I had some shop work scheduled on the RV. While they awaited the CORRECT part I re-wired the plug.


On the other end of the cord.. Those are "Screw clamnps" in the Marinco outlet.

I had a fellow RVer.. So new the sticker was still in the window.. NO POWER when he plugged in (Good 50 amp site. COE park and they know how to do 'em right).

Upon grabbing the test gear.. When we unplugged from the outlet from the trailer.  It fell off in my hand.

There are SIX scerews inside. two Hot clamps. Neutral, Ground and two strain relief clamps.. ALL were loose. trhey had not tightened a one of  'em.

We got er re connectred

I would hae loved to be a fly on the wall when he got back to his dealer.. OH yes. I'll be the dealer lost about 10 pounds from teh roast area.
 
So, what I'm taking away from this thread is that I need to add checking the tightness of the screws in my plug to my annual maintenance list.
 
Optimistic Paranoid said:
So, what I'm taking away from this thread is that I need to add checking the tightness of the screws in my plug to my annual maintenance list.

Plus the screws in the rear of any twist-lock connections and the screws in your breaker box.  A loose connection at the pedestal is one thing, but if it is in your wall there may be a fire.  I found my twist-lock completely loose.
 
Optimistic Paranoid said:
So, what I'm taking away from this thread is that I need to add checking the tightness of the screws in my plug to my annual maintenance list.

It would be a good idea, and it really shouldn't take very long to do.  And it certainly beats the alternative of a loose connection or two which can and does cause serious issues.
 
Not being an electrician my first thought was the transfer switch. It sounded like a high voltage situation to me, but I was thinking that due to Kev's extensive solar array that somehow the voltages from the solar and the voltage supplied from the solar somehow met and created an overload situation.  But again,  I am no electrician.
 
Sun2Retire said:
Wow Kevin, that could have been really bad.


Wasn't cord related but I'm 99% certain I had an intermittent bad neutral on a pedestal early in the year, that only showed up under load. Came back to RV with 230 showing on plug in volt meters. (Didn't have a Progressive, only a surge protector.) Took out inverter, charger, microwave and surge "protector". When voltage was checked at pedestal after I unplugged both legs read fine so park (a very high-end one BTW) took no responsibility.
I had a similar problem. Took out all the electronics yours did. I had a TRC SurgeGuard plugged in and it let the spike pass through. The campground didn?t take responsibility, but TRC did and reimbursed me for some of the damages and replaced the SurgeGuard.

http://www.rvforum.net/SMF_forum/index.php/topic,107243.msg965326.html#msg965326
 
To follow up, I replaced all the burned out components today, and everything is working fine. In the picture of the disassembled plug, you can see that the white wire had come loose, and that was all it took to cause the AC?s water pump armature to burn up (sending smoke through the AC vents) and the washing machine?s mother board and surge capacitor to burn up.

The tech guy at Splendide (the washing machine manufacturer) said the surge capacitor is designed to protect the washer from voltage surges up to 150 volts. Obviously, we were way above that. In the picture, you can see a burn mark on the metal case of the capacitor. The flame originated inside the surge capacitor and acted like a blow torch, burning right through the metal case, setting the paper data sticker on fire. Luckily, the flame went out on its own.

It?s pretty easy to take the cover off the power cord plug and inspect the wiring, as xrated recommended, and that?s what I?m going to start doing every few months. After experiencing this, which was all caused by a single loose wire, I?d recommend that it be an inspection item on everyone?s RV.

Kev
 

Attachments

  • F7A41F3B-A786-48A8-8037-DF119D233625.jpeg
    F7A41F3B-A786-48A8-8037-DF119D233625.jpeg
    103.9 KB · Views: 42
  • 2CEE6B07-0919-402B-BD55-5A43C25F11F9.jpeg
    2CEE6B07-0919-402B-BD55-5A43C25F11F9.jpeg
    82.3 KB · Views: 38
  • 5202E9C0-EF5C-47C9-AC0F-52E738F97B2D.jpeg
    5202E9C0-EF5C-47C9-AC0F-52E738F97B2D.jpeg
    41.8 KB · Views: 36
also not a bad idea to check all your connections inside as well in the circuit breaker box.  Power off of course.  I had a few that needed tightening on a brand new unit......
 
Hey Kev, did your Inverter come through the overload incident OK? When you were describing the damages I was wondering if it sustained damage from the overload.
 
jims94vmx said:
also not a bad idea to check all your connections inside as well in the circuit breaker box.  Power off of course.  I had a few that needed tightening on a brand new unit......
I always check with the power on. I am a retired electrician and crazy. ::) But it would not do me any good to turn off the power because I was taught to treat power that is turned off with the exact same respect I would treat it if the power was on. So I would be wasting my time turning the power off and then I would have to reset all my clocks.  ???
 
I think that's good advice jims94vmx, although I do understand Tom's point about having to reset all the clocks.  :D Marty, the Magnum 2812 inverter/converter combo unit has some built-in high and low voltage protection features, which will automatically shut the unit down if it detects out of parameter voltages. The high voltage trigger is 125 volts. Thankfully, it worked, and our inverter is working fine. I think you have the same unit.

Kev
 
There's a funny ending to this story, which I'll share with you, because I know NO ONE else has ever made this mistake.

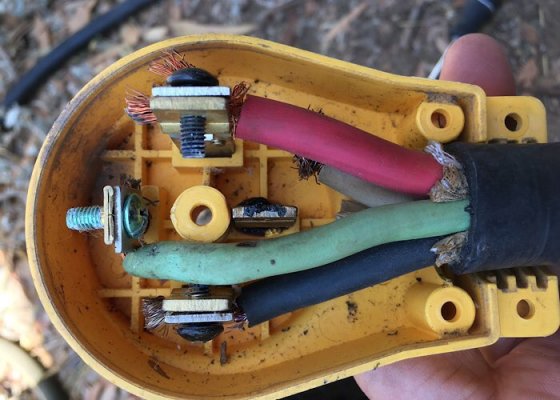
In a Winnie 42QD, you, basically, have to disassemble the rear bathroom to get the washing machine out, because the mother board and surge capacitor can only be accessed by removing the washing machine's rear access panel. To get the washer out, you have to remove the valance around the large emergency-escape window, the macerator toilet, a large facia panel that covers the washer and dryer, a heat exchanger for the Aqua Hot system, a magazine rack, and you have to disconnect the hot and cold water hoses at the rear of the washer by reaching through an access hole that's barely big enough for the task. Then, of course, you get to reinstall everything.

I'm quite sure the designers were laughing their butts off when they were designing how this puzzle would go together. (Although in all honesty, I don't really see a better way of doing it.)

So I got everything apart, got the washer out (it's heavy!) swapped out the parts, and then before I reinstalled everything, I wisely (or so I thought) tested the washing machine by running a load through it. It all worked. Hooray! I lifted the washer back into its cabinet, and then went through the very time-consuming process of carefully replacing all the components and cabinets. Done!

After gathering all my tools and patting myself on the back for a job well done, I walked out of the rear bathroom, and there on the bed was the washing machine's rear access panel. I had forgotten to reinstall it before lifting the washer back into its cabinet. :'( 

I briefly considered just leaving it off, or perhaps using my chain saw to carve an access panel in the rear cap, which would have given me MUCH easier access to the rear of the washer, but alas, I knew I was going to have to tear everything apart again. I cried for a few minutes (it was a manly cry) then disassembled the rear bathroom... again.

Kev
 
Back
Top Bottom