HueyPilotVN
Well-known member
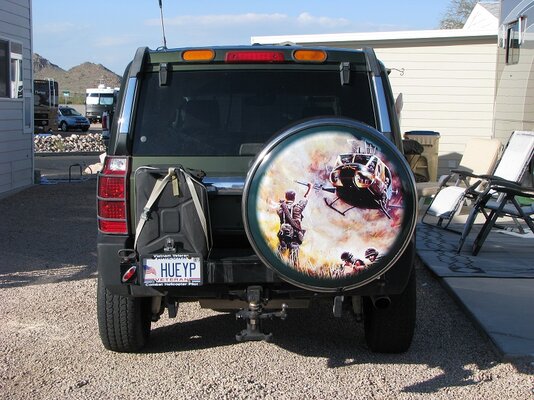
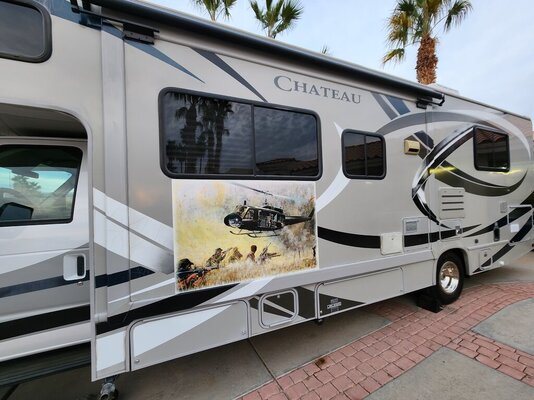
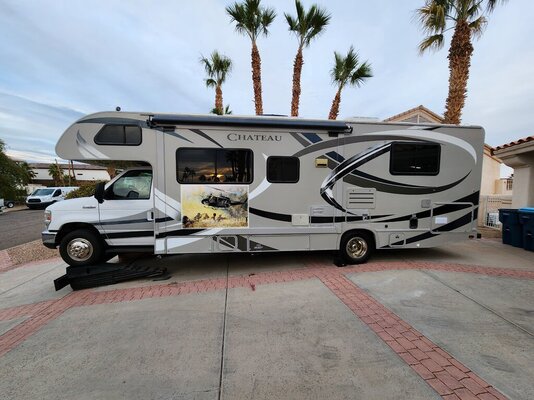
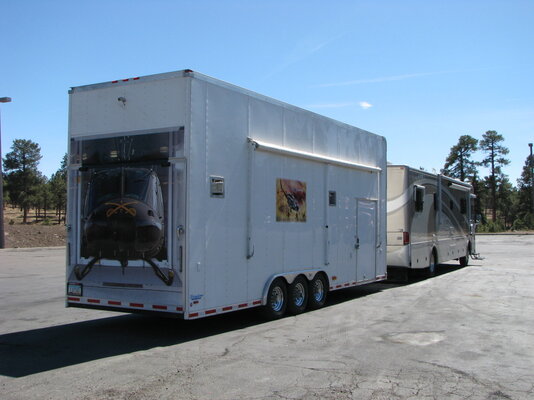
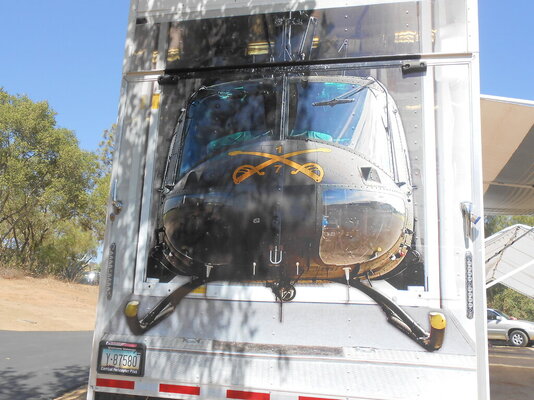
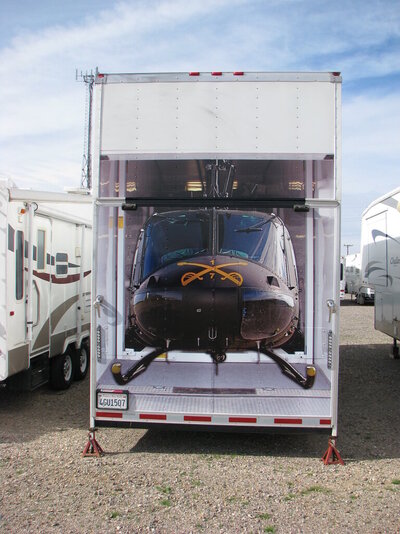
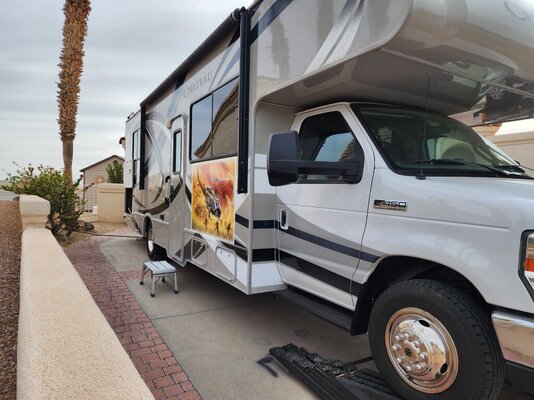
On my old Stacker Trailer I had three large Murals. One was of a Huey sitting inside my trailer as seen from the rear. It was located on the ramp door.
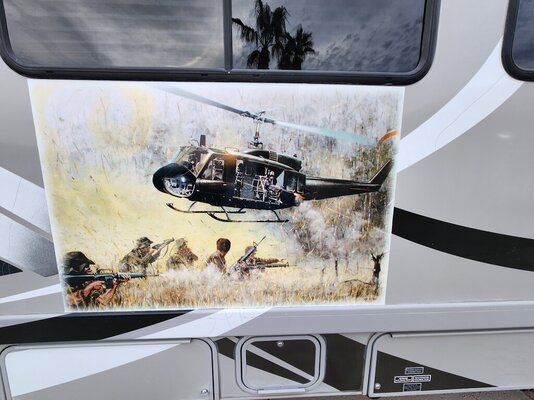
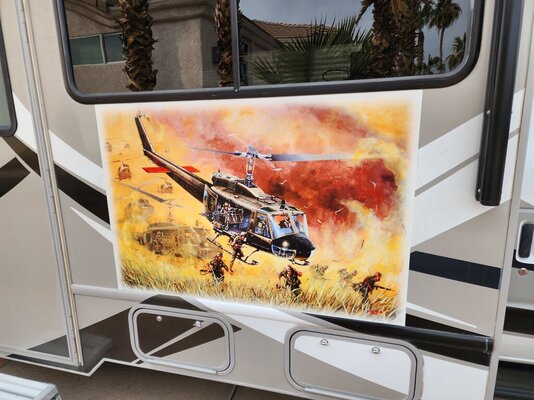
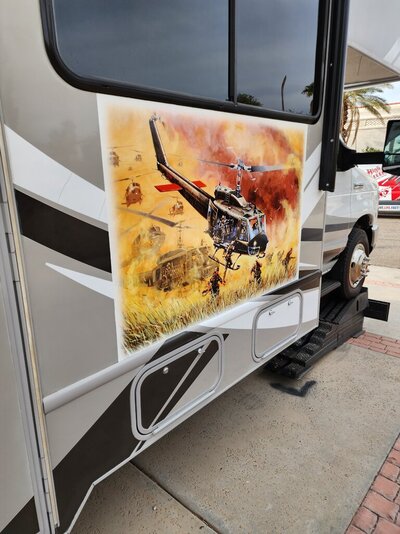
The other two were made from prints and pictures that I got from Joe Kline the Artist.
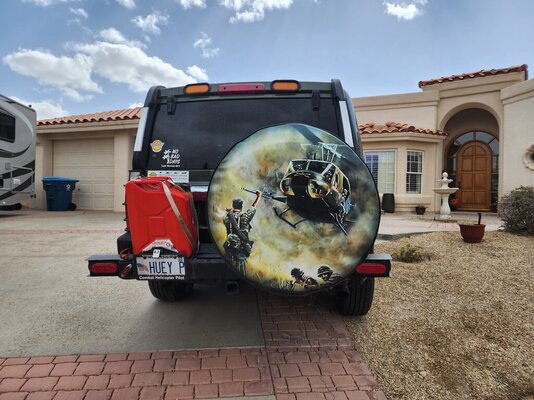
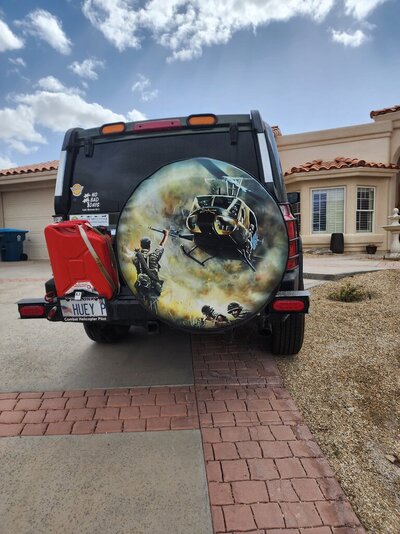
I wanted to put new ones on my Class C Thor so I called the company that did the first set, (RV Stripes and Graphics in Apache Junction). They made me a set of the two Joe Kline murals.
I did not want to drive to Phoenix for the install. I called all the local graphics installers, and they would not install anything that was not their product.
Thomas, from RV Stripes sent me detailed instructions and I watched a few U Tube Videos.
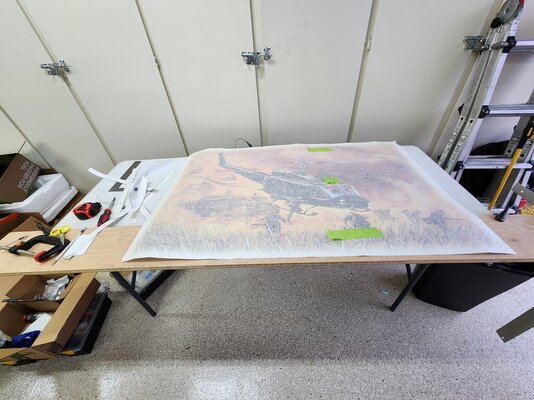
I had forgot how big the murals were and the new ones were about an inch to large all around for my new RV. Luckily there was a white border around the edge. I was able to carefully remove the white edge using blue masking tape, a straight edge and a utility razor knife.
The installation involved first taping the mural in the exact place with blue masking tape strips at the corners. Then I placed a coupled of vertical tape strips on the center of the mural. The next step was to remove the locating tape on the corners and the backing from the right side and expose the adhesive side.
The tricky part was to start at the center of the mural where the vertical tape is and using a plastic tool carefully work out from the center smoothing out wrinkles and bubbles. while holding the mural away from the surface. You then do the same to the other side.
Here are some pictures.
The other two were made from prints and pictures that I got from Joe Kline the Artist.
I wanted to put new ones on my Class C Thor so I called the company that did the first set, (RV Stripes and Graphics in Apache Junction). They made me a set of the two Joe Kline murals.
I did not want to drive to Phoenix for the install. I called all the local graphics installers, and they would not install anything that was not their product.
Thomas, from RV Stripes sent me detailed instructions and I watched a few U Tube Videos.
I had forgot how big the murals were and the new ones were about an inch to large all around for my new RV. Luckily there was a white border around the edge. I was able to carefully remove the white edge using blue masking tape, a straight edge and a utility razor knife.
The installation involved first taping the mural in the exact place with blue masking tape strips at the corners. Then I placed a coupled of vertical tape strips on the center of the mural. The next step was to remove the locating tape on the corners and the backing from the right side and expose the adhesive side.
The tricky part was to start at the center of the mural where the vertical tape is and using a plastic tool carefully work out from the center smoothing out wrinkles and bubbles. while holding the mural away from the surface. You then do the same to the other side.
Here are some pictures.
Attachments
Last edited:
")