It's roof time!

The friendliest place on the web for anyone with an RV or an interest in RVing!
If you have answers, please help by responding to the unanswered posts.
That makes perfect sense, it's what I imagined.

Thanks for the tip about a newer strip - I will look for that. The current one is definitely sealed on, and if something it getting sacrificed it's not going to be the wall of the motorhome. ;) If there's a "replace with newer/better" option I'm all in.

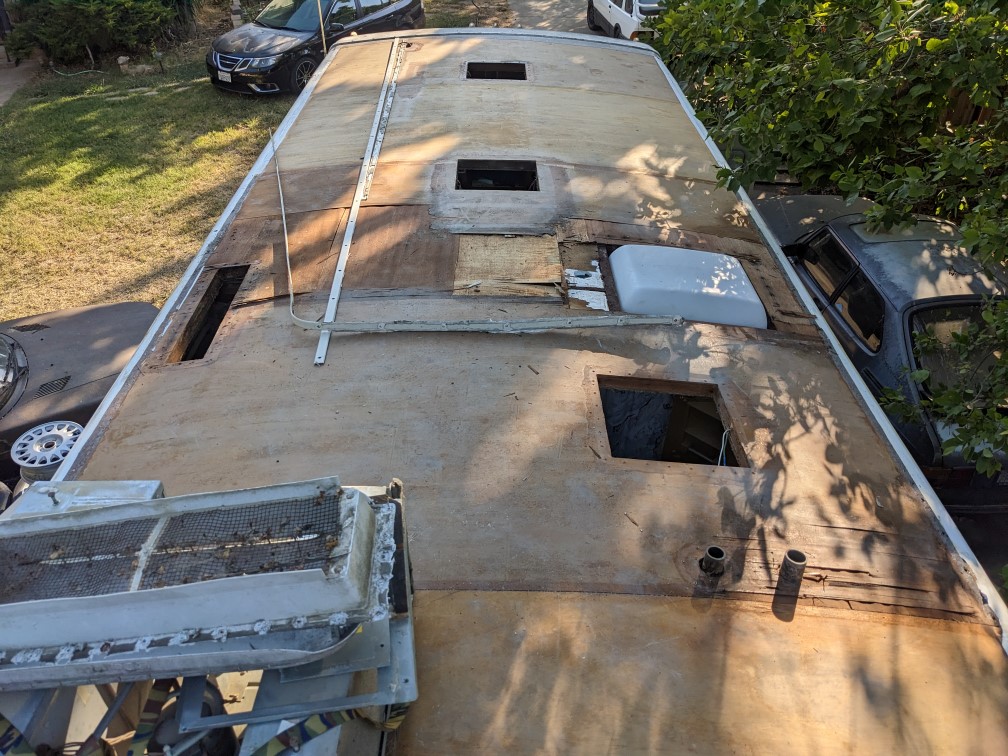
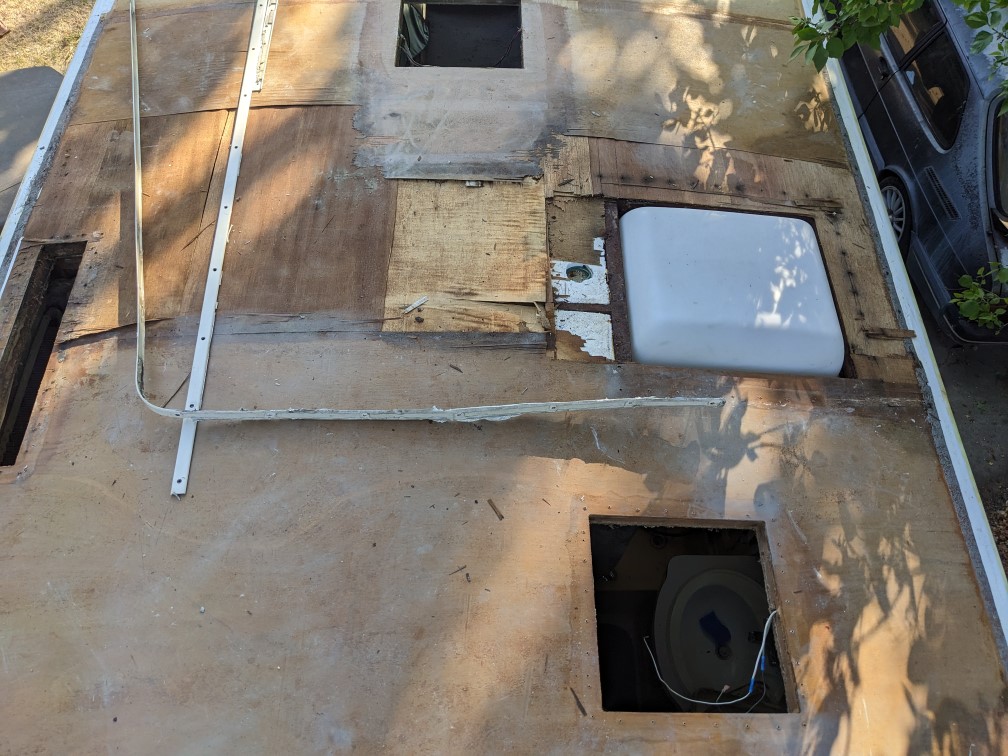
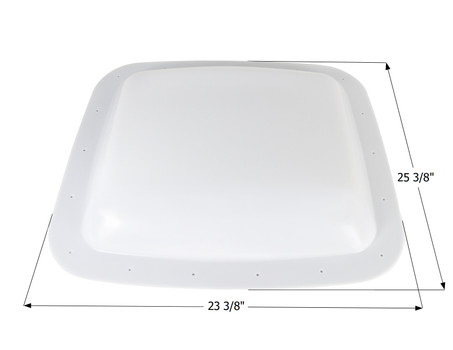
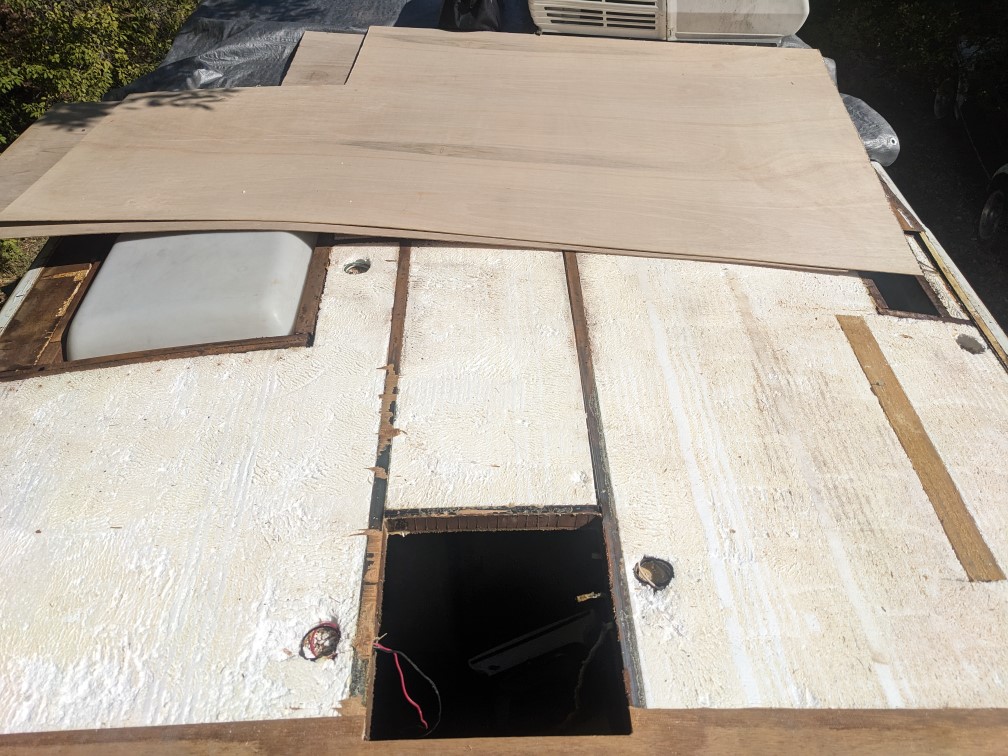
I'm going to get started on teardown this weekend. Goal is to at least get all the fixtures off the roof. Start making a shopping list. I'm intending on replacing the roof vents with something fan-equipped... the bathroom already has one, but the fan itself is joke... 4" or something! Also planning on scrapping the OTA antenna to clear up room for some additional solar. There is room towards the rear for that, but I don't want to install something I might later have to trip over.

I'm sure it will be difficult, but I think it'll be a fun project with a productive outcome.
 
Day One was pretty productive:

southwind_stripped_roof1.jpg


I found the strips were actually riveted into the fiberglass, which seems like a bad design, but it's held up for 30 years, so what am I complaining about?

Related, the only difficulty I ran into was that the rear strip between the body and end cap was a royal PITA on the side. The rivets were extremely haphazardly installed, at unexpected angles, and in a couple cases inexplicably crushed between the fiberglass and the steel body structure. Removal was not super clean, and I'm not confident they will go back. I may end up using screws - t won't look quite as nice, but it'll be livable.

Today's task is to remove these two sections of plywood:

southwind_stripped_roof2.jpg


If I'm honest, they were not nearly as bad as I expected them to be, so that's positive. I started peeling one away to get a sense of what's under there... about what I expected.

Because the plywood is water-damaged and separating, what is likely to end up happening is that I will peel away all but the very last paper-thin layer, which is glued down to the styrofoam. It would be an agonized process to remove it, and no doubt damage to the styrofoam would result. That paper-thin layer isn't getting in anyone's way, so it can stay there. :)

I won't be able to work on it during the week, so I'll tarp it over (clear skies, but I don't need wildlife falling in there...). By next weekend I need to figure out what to glue the new plywood down with, and I want to run some new electrical for the new solar I'll be installing. I also want to figure out a way to run 12v to the rear vent position. (The easy way is pull up another section of plywood, but I really don't want to... :) )
 
I was not productive on day two. :D

It took an annoying amount of time getting the screws along the side rails out, and then I started agonizing about the wood.

What I found - which surprised me, but may not surprise anyone else - is that the roof is two layers of 1/8" plywood overlapping across the entire roof. The construction makes sense, especially for a curved roof, but it adds a layer of complexity here I hadn't anticipated.

I'm not too concerned about it, I'll have to section the bottom layer so I'm removing just this area, but I've found a sharp utility knife does an adequate job there. Additionally, much of the bottom layer (unfortunately, not all of it...) is in pretty good shape, so it's not going to peel off. I used a putty knife to "cut" the glue, and while it's slow going, it does a good job of separating wood from styrofoam.

I'm not sure yet how this goes back together - the primary obstacle is where I'm going to source 10' long, 1/8" plywood locally. Standard 4x8s won't cut it, and I'd like to avoid any unnecessary seams.
 
Called a few lumber yards hoping to find someone who had 1/8" hardwood plywood in 10' sheets, but not having any luck. Everyone has lauan/luan in 10' lengths, so that's probably where this goes. Whatever. :) That's the project for this weekend.

I'm going to replace pretty much all the roof fixtures. Fortunately, I don't have to worry about the roof AC - a smog shop smacked the old roof AC into their garage a couple years ago, so it's essentially new. But, the three vents and the skylight over the shower are old and crumbly and the MaxxAir covers got abused last winter.

I've really enjoyed the MaxxAir covers and intend to stick with them. I'm planning on using the MaxxFan vents for the forward vent and the bathroom. If I can figure out how to (easily) run 12v to the rear vent position, I'll do it there too.


These vents allow use of the clip-on covers


which seems convenient.

The bathroom skylight is quite large - ~25" square, but covers an opening that is 19x21. I'm not sure why the mismatch in size, but it's not consequential. I've found Icon seems to make exactly the right thing:


Does anybody know anything about Icon Direct?
 
Never heard of Icon. I've got a cargo trailer with some dry/sun rotted vent lids I'll need to replace eventually. E-trailer has what I need when I get around to it.
 
Yeah, I could replace just the lids, but but since the entire vent body is out already, I'm going to replace with new ones that have built-in fans. We rarely use the AC, but having some air circulating would be nice. I'll deploy enough solar to ensure they can run all the time. ;) The bathroom vent already has a fan, but it's a puny 3" fan that's old and noisy and ineffective... it's gotta go! :)
 
Does anyone know if there is such a thing as a rooftop electrical box for an RV?

I would like to leave one or two receptacles on the roof - one for plugging in solar to an interior controller, one for a 12v device. I could just leave a pair of wires dangling up there, but it seems like there has to be some sort enclosure for this...?
 
There is. I saw it on one of the u-tube rv people who were getting a no-limits comms system installed. Jump to 7:20 to see him prepping the box. Unsure if you can scan the video or just watch the whole thing to see if they name the product. He doesn't at least at the index I mention. It appears to be some sort of waterproof electrical enclosure that comes as a sealed box with a lid, then the installer fits it to whatever they're using it for. In the video, he fits it and completely installs it, so the whole thing may be of interest.

 
There is. I saw it on one of the u-tube rv people who were getting a no-limits comms system installed. Jump to 7:20 to see him prepping the box. Unsure if you can scan the video or just watch the whole thing to see if they name the product. He doesn't at least at the index I mention. It appears to be some sort of waterproof electrical enclosure that comes as a sealed box with a lid, then the installer fits it to whatever they're using it for. In the video, he fits it and completely installs it, so the whole thing may be of interest.


I can't believe I didn't think of that... I used to use almost exactly the same type of enclosure doing residential wifi in rural areas. That's perfect, thanks! I just need to find a relatively small one.

(This also makes me wonder if now is the time I put up a "real" wifi antenna on the roof. I've been very successful with a boosted omni on the dash, but..... :) )
 
(This also makes me wonder if now is the time I put up a "real" wifi antenna on the roof. I've been very successful with a boosted omni on the dash, but..... :) )
I bought a Winegard GW-1000 router off eBay to work with the 360+ roof antenna my camper came with from the factory. Just one trip to judge by confirms that it's heeled by crappy campground wifi. I reactivated an old Verizon hot spot sim for it, and that worked better.

Maybe if you regularly stay in campgrounds with otherwise good wifi, it would be worth the effort to put an antenna or booster up on the roof. For now, we're occasional long weekenders at random places, so I probably wouldn't.
 
I'm definitely trying to pilfer *$ wifi etc. :D It's hardly an important item - when we're out we are trying to be unplugged, and rarely if ever sitting inside, much less on the internet. I really look at it as an emergency tool that could help at some point. :)

My new obstacle is that apparently 4x10 plywood is very out of fashion. No yard within 100 miles carries it, and the only way to get it is to buy an entire unit. I don't know what qualifies as a unit of 1/8" plywood, but more than I need. :/

I was hoping to avoid this, but it looks like I'm going to be making a patchwork of 8' sheets. That's gonna be real fun to figure out how to attach to the irregular steel frame. Real fun. Stupid curved roof. :/
 
I don't think patching will be too difficult. Time consuming yes but difficult no. Just use flathead self taping screws and stager the joints. If you get a few areas that need to be leveled out, used Bondo or fiberglass resin. Smooth out edges with a belt sander Good Luck
 
Yeah, that's basically the plan. It's definitely doable, just more annoying. ;)

I asked the local lumber yard to extend their search further south - it wouldn't be awful picking up wood deeper into the central valley. I'd happily spend an hour or three driving if it means less plywood Tetris. Fingers crossed!

The "best guess" skylight will be here tomorrow for test fitting... once that's sorted I don't have any more excuses to avoid getting back to work. :)
 
Skylight looks like it will be fine. It's the right dome size, but the perimeter of the plastic is smaller than what was there. I don't see any issues with that.

I came up with nothing further on the 4x10s, and then - wait for it - I realized I hadn't measured it across ever. I read "4x10" on the internet, and that's where I stopped. No idea. So I measured it the other day, and discovered that - due to the radiused corners - the "deck" is 7' 10" across. If I had to go out to an imaginary corner, it'd suck... because as-is, an 8' sheet works FINE.

I completely stripped a 4' section of the roof. I did not want to pull the full 8' section at once, as I grew concerned without the support from above, the styrofoam might start to sag, which would be an issue.

southwind_bareroof2.jpg


I need to clean the steel structure further, but it's overall well-manicured. ;)

I picked up some 4x8s and got to sizing... I cut enough to do the patch I'm doing, and then a couple more sheets to be part of an overlay for the whole roof.

southwind_bareroof1.jpg


After a bunch of reading, I decided to take a risk on 3M FastBond Contact Cement .... several people recommended using foamboard adhesive for the first layer, but others reported contact cement working fine. As rollling it on seems to be what you wanna do, I'm going with the 3M stuff. It's $60/gallon, so it's gotta be good, right? That comes in this week, so next week I should have all the plywood done. Then, onto the actually difficult work.
 
Yeah, that isn't an issue with the 3M stuff, which was one thing that attracted me to it. It's water based and "safe for foamed plastic." I'll test it, but anticipate no issues.
 
3M FastBond works as advertised, and doesn't melt styrene. :)

I got the first repair section done yesterday. It was definitely a learning experience, the biggest lesson being that "water based adhesive curls thin plywood immediately." The plan I'd had to install went out the window really quick. Compounding issues is the curved roof and limited working space, but I think it got done satisfactorily.

What I found was that for this to work you need a fair mount of weight on the new plywood to ensure it sits firmly against the frame, more than I anticipated. I ended up hauling a couple race cars worth of wheels & tires up there to hold everything down. ;) I also found heavy duty masking tape to be extremely helpful around openings and at the edges. The FastBond says 30 minutes for full adhesion, but that doesn't seem true in practice. With 90 degree sun beating down on the roof, it was still just tacky after two hours.

I believe there is a 6" spot along a border with the existing roof where things didn't go perfectly. The new wood stands about 1/16" proud. I don't think it will be an issue, but I'll probably sand it down anyway. I don't want to run the risk of an air bubble getting worse with climate, etc.

I installed one layer at a time, wanting a full bond and fully dried adhesive before moving to the second layer. But, I'm thinking it might actually be better to do both layers at once, weight everything down, and then just let it sit overnight.

So far I have $1k into this project. That includes $250 in cordless tools that turned out to be required. All my tools are air powered, which is great for working in the garage but really awkward for working 15' up in the air in the driveway. The only remaining purchases are the replacement vents and the rubber itself. I suspect this will come out very close to my original $2k estimate.

Next weekend I'll strip & repair the remaining ~4' section of damaged plywood. I need to call the rubber manufacturer and verify I'll need fresh plywood for their glue... hopefully today or tomorrow. It would be great if I didn't have to put a 3rd layer of wood down. It's not expensive or difficult, just time consuming.
 
And... it's raining. Never rains here this time of year, which is why I decided to do the roof now.

Thankfully, I'm a big believer in Murphy's Law, so had already re-tarped the roof or, man, it would have been a disaster.
 

Latest posts

Forum statistics

Threads
131,990
Posts
1,388,722
Members
137,736
Latest member
Savysoaker
Back
Top Bottom