macnkat
Well-known member
Out with the old, in with the new. 8)
We just bought a 2001 Bounder that had the old tube TV's in it...OK for DVD's, but not much else. I bought a 24" Dynex LCD from Best Buy for $249 and a wall mount bracket for $19. Then to Home Depot for some MDF, 3/4".
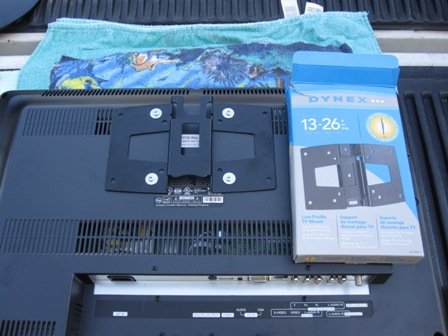
Here's what I was dealing with. pic 1
The problem is trying to stick a 25.5" wide TV in a 19" slot, it doesn't work. My first thought was to mount it over the existing hole with a pull away swivel/tilt TV mount, but I didn't like the idea of the TV moving while on the road. So some demo is in order. Remove the trim. pic 2
Then demo the existing brackets so you have a clean slate. pic 3
Mount the bracket to the TV. There are two options here, flush and a slight tilt down, I chose the tilt and it is perfect. pic 4
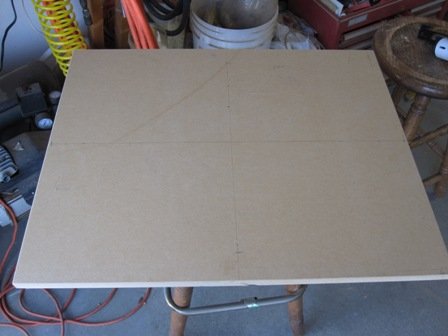
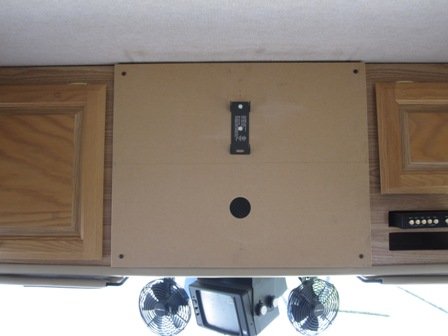
The TV is 25.5" wide, I cut the MDF to that width and tall enough to cover the hole entirely. pic 5
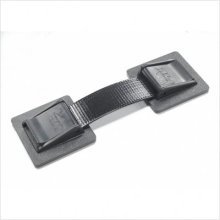
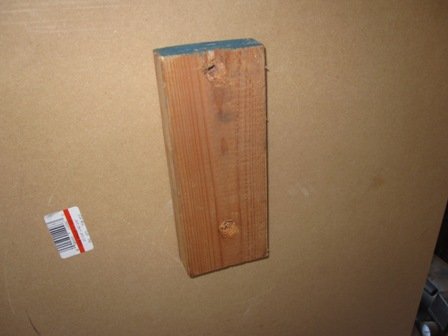
Attach a scrap piece of 2X4 to the back where you want to mount the bracket so the lag bolts will have something to bit into. pic 6
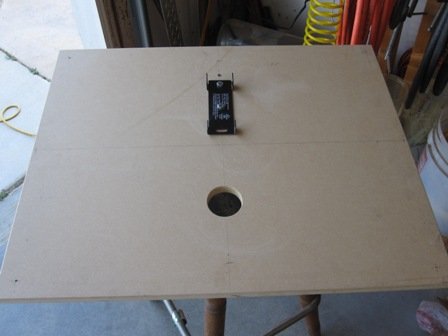
Mount the bracket and cut a hole for your cables. pic 7
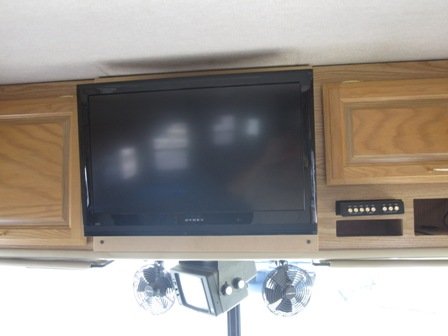
Test fitting, looks great. pic 8
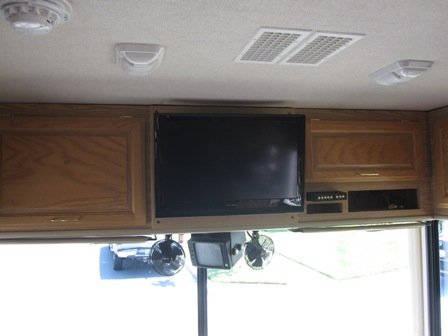
Finished product looks good. I will cover the MDF with a fabric when my wife decides what she wants there, but it looks pretty good as is with the light colored cabinets in the RV. The final step was to attach a appliance strap to the bottom of the set (not shown) and the MDF right behind the TV to keep it in place while driving...a test drive proved very successful. No rattling or squeaks like the old set and now we have HD/digital while we are on the road! pic 9 & 10
We just bought a 2001 Bounder that had the old tube TV's in it...OK for DVD's, but not much else. I bought a 24" Dynex LCD from Best Buy for $249 and a wall mount bracket for $19. Then to Home Depot for some MDF, 3/4".
Here's what I was dealing with. pic 1
The problem is trying to stick a 25.5" wide TV in a 19" slot, it doesn't work. My first thought was to mount it over the existing hole with a pull away swivel/tilt TV mount, but I didn't like the idea of the TV moving while on the road. So some demo is in order. Remove the trim. pic 2
Then demo the existing brackets so you have a clean slate. pic 3
Mount the bracket to the TV. There are two options here, flush and a slight tilt down, I chose the tilt and it is perfect. pic 4
The TV is 25.5" wide, I cut the MDF to that width and tall enough to cover the hole entirely. pic 5
Attach a scrap piece of 2X4 to the back where you want to mount the bracket so the lag bolts will have something to bit into. pic 6
Mount the bracket and cut a hole for your cables. pic 7
Test fitting, looks great. pic 8
Finished product looks good. I will cover the MDF with a fabric when my wife decides what she wants there, but it looks pretty good as is with the light colored cabinets in the RV. The final step was to attach a appliance strap to the bottom of the set (not shown) and the MDF right behind the TV to keep it in place while driving...a test drive proved very successful. No rattling or squeaks like the old set and now we have HD/digital while we are on the road! pic 9 & 10
Attachments
-
 IMG_0344.JPG50.6 KB · Views: 282
 -
 IMG_0346.JPG49.3 KB · Views: 188
 -
 IMG_0349.JPG49.2 KB · Views: 255
 -
 IMG_0350.JPG59.1 KB · Views: 245
 -
 IMG_0351.JPG45.3 KB · Views: 219
 -
 IMG_0352.JPG39.3 KB · Views: 206
 -
 IMG_0353.JPG40.6 KB · Views: 220
 -
 IMG_0354.JPG40.3 KB · Views: 213
 -
 IMG_0356.JPG39.7 KB · Views: 301
 -
 IMG_0357.JPG39.7 KB · Views: 268