New Project, Solar for Class C

The friendliest place on the web for anyone with an RV or an interest in RVing!
If you have answers, please help by responding to the unanswered posts.
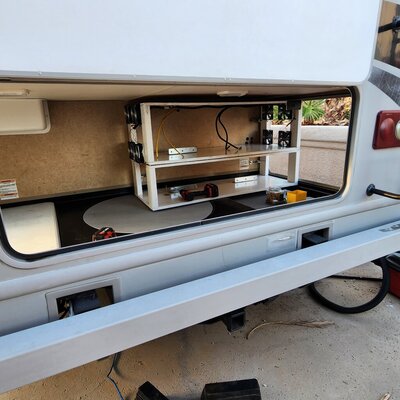
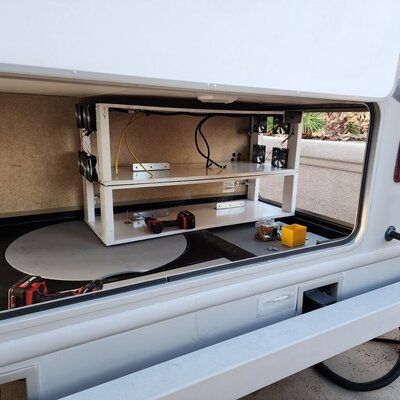
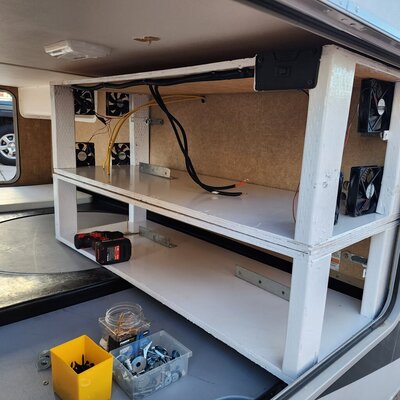
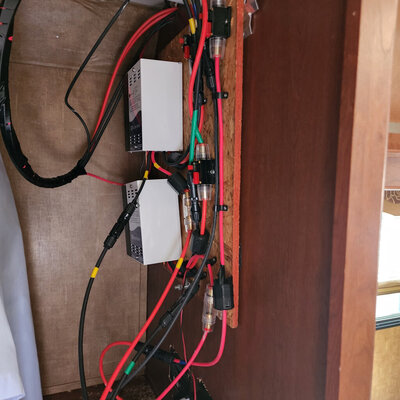
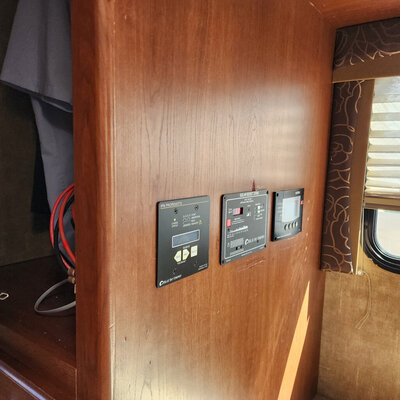
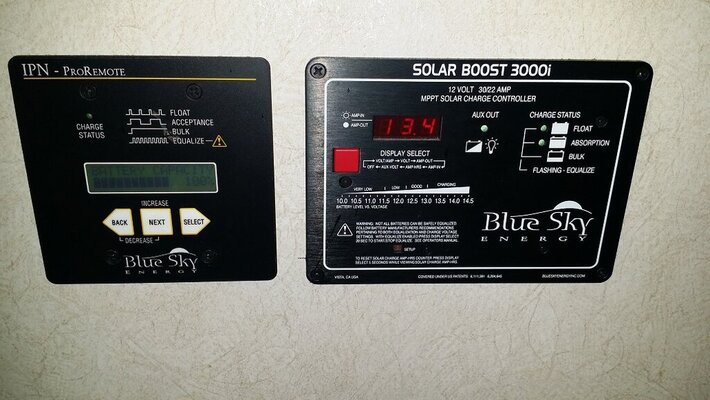
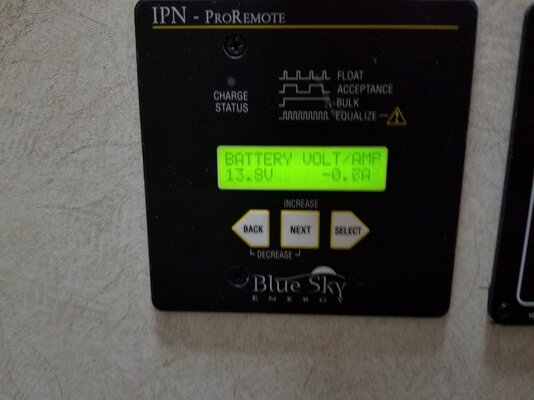
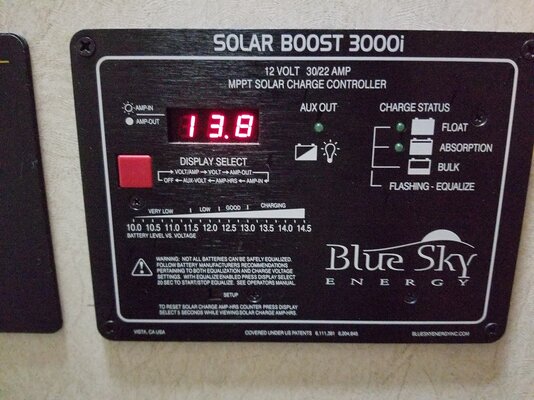
The charge controllers are the same model as I used on my Country Coach. They are networked as a master controller and two slave controllers. The master also is linked to a system monitor, (like a Trimetric monitor). as are the two slave controllers.

Each controller has a circuit breaker before and after the unit.

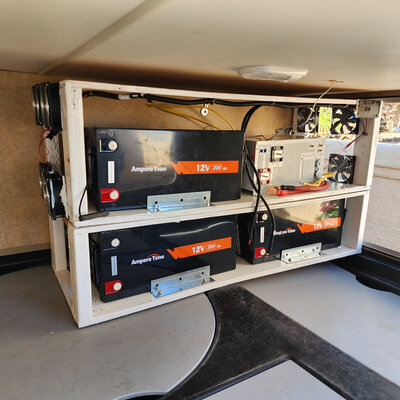
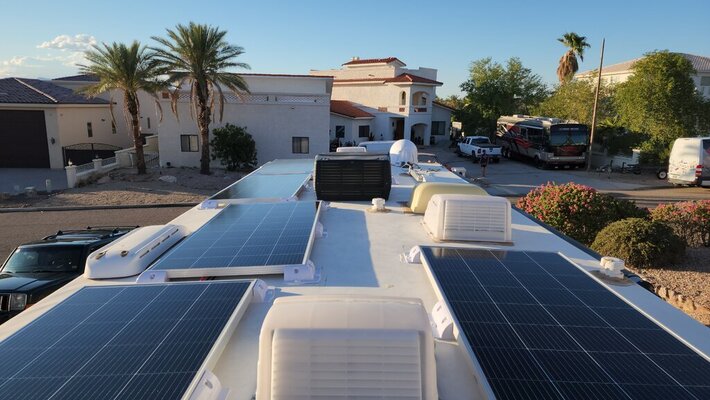
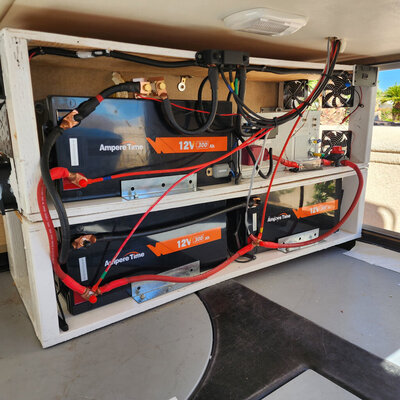
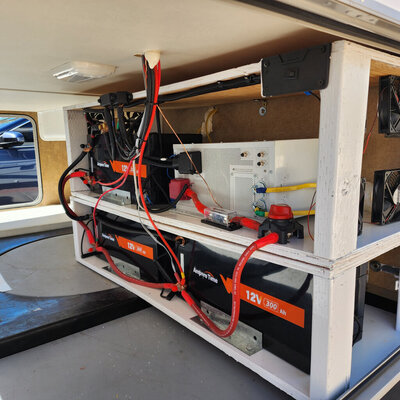
The way the system will be setup will act as three separate systems feeding into one battery bank. Each system is fed by one of the three 400 watt sources, (two 200 watt panels in parallel). The total panel wattage is 1,200 watts from six panels.

All three systems communicate and feed the bank but if one is shaded the other two do not have there input reduced.
 

Attachments

  • r20171030_200126 (1).jpg
    r20171030_200126 (1).jpg
    127.6 KB · Views: 7
  • r20181217_214116_001.jpg
    r20181217_214116_001.jpg
    214.1 KB · Views: 7
  • r20181217_214121 (1).jpg
    r20181217_214121 (1).jpg
    370.2 KB · Views: 7
Last edited:
Again I spent part of the day working on the project in the garage with the swamp cooler running.

I got the two computer fans that I ordered from amazon and I found three more in with my misc parts.

So I installed all five of them with a switch so I can turn them off in cold weather.

I also fabricated the battery cables using welding wire/ battery cable 2 / 0 gauge.

It turns out that the output from the transfer switch is located under the bed and I will be able to cut the line going to the circuit breaker panel and insert a 30 amp breaker in the line feeding the A/C input to the Inverter and then route the output from the Inverter back to the main panel by connecting to the existing line under the bed that I cut to insert the Inverter in the feed circuit.

I think that I have all the openings for routing all the wires from the back storage area to the equipment.

The next step will be to remove all the equipment from the shelves and install the shelves in the RV and reinstall the batteries, Inverter, and wiring.

The Solar Panels are all ready but I want to wait for cooler weather and for someone that is more comfortable working on the roof.

Here are some new pictures.
 

Attachments

  • 20220912_183200.jpg
    20220912_183200.jpg
    208.1 KB · Views: 23
  • 20220912_183207.jpg
    20220912_183207.jpg
    283.6 KB · Views: 24
  • 20220912_183220.jpg
    20220912_183220.jpg
    239.5 KB · Views: 24
  • 20220912_183223.jpg
    20220912_183223.jpg
    198.4 KB · Views: 22
Another progress update:

It is taking me a long time to do this project but there are a few reasons for it.

I am kind of low on energy and I keep ordering different part as I discover the need for them. As an example, yesterday as I was installing battery lugs on the 2 / 0 cable and I discovered that I need a hydraulic crimper to do the job. I also had to get some larger lugs from the local battery shop.

Amazon delivers quickly, but I am usually waiting for that last part for the stage I am at.

Yesterday I finished putting together the charge controllers panel that will install on the inside wall of the shirt closet in the bedroom directly above the storage compartment and the batteries.

There are three charge controllers, two are mounted on the panel inside the closet and the Master controller is surfaced mounted on the outer wall of the closet along with the monitor and the Xantrex control panel.

All the cables from the solar panels will come down thru the closet and connect at the top of the charge controller panel. They have fused circuit breakers for the input and fuses for the output to the batteries
.
I also wired the network cables for the IPN network before mounting the controllers. The temp monitor and the shunt go directly to the master controller.

The controller panel is removable from the wall. I wish I had read the post where Solarman recommended mounting the controllers to a metal panel.
 

Attachments

  • 20220917_182108.jpg
    20220917_182108.jpg
    318 KB · Views: 21
Last edited:
Another install update:

Today I reassembled the shelves and equipment to measure and cut all the cables for connecting the battery bank to the inverter and on to the 12 volt bus bar that will be located by the converter / charger.

Fortunately I can disable the charger function in the converter by simply flipping off the lower circuit breaker on the converter.

I did paint the shelves while they were empty.

I now have eight computer fans wired in parallel to blow air in the same direction across the batteries and inverter. They are controlled by a switch by the outer compartment door.

I also installed vents in both of the access doors to the storage compartment so air will be pulled from the one and exhausted to the other.

I have drilled all the holes for the wiring to pass thru the storage compartment wall so I can now install the shelving without having to move it at all.

I ordered way to many extra parts to be sure that I had enough. My give away box has lots of free installation parts including about 100 feet of monster big battery cable in case anyone needs battery cables.
 

Attachments

  • 20220917_180439.jpg
    20220917_180439.jpg
    213.5 KB · Views: 19
  • 20220917_180424.jpg
    20220917_180424.jpg
    256.1 KB · Views: 20
  • 20220917_180433.jpg
    20220917_180433.jpg
    236.4 KB · Views: 22
  • 20220917_154758.jpg
    20220917_154758.jpg
    206.7 KB · Views: 22
  • 20220917_155448.jpg
    20220917_155448.jpg
    102.9 KB · Views: 22
Stick one of the batteries in a freezer overnight, then see if it accepts charging current once it's frozen. My Lion Safari batteries won't, as I once found out when the overnight temperature dropped to 30 degrees in Laughlin. They continued to produce power but protected themselves by not accepting charging current until they warmed up later in the day. Scared me for a bit until I realized what was happening. Be quick with the test, as charging a lithium battery below freezing will permanently damage it.

Will Prowse tested the 50 ah Ampere Time and it only had a high temperature cutoff.

 
Yeah, DonTom's motorcycle did that to him last May when he camped at French Camp, near Bishop with me. Took him a bit to figure out what happened.
 
Solar Project update:

I have been slowly making progress on the installation. Partly because I am still getting stronger and also I have been waiting for cooler weather.

I have all the components assembled and have started to put them in place.

I did have one set back. While securing the shelving in the storage compartment to the wall I mistakenly put a screw into my fresh water tank under the bed. After trying to patch it in place I finally gave up and removed it to fix it.

It was not that hard except for disconnecting the different inputs and outlets. I had to cut the plastic drain hose to get it out.

I used a product from J B Weld that is safe for potable water tank repairs. It is a round stick that you knead with your fingers to activate and then form a pancake like slab and press in onto the tank. The hole was very near the bottom of the tank so I could form the patch on both the side and the bottom of the tank. I also covered the patch after it cured with Gorilla Tape. The fix worked and was just a detour on the project.

Here are the latest pictures of the shelves installed and I paid the pool guy to help me put the Lithium batteries and the Inverter in place.
 

Attachments

  • 20221003_174137.jpg
    20221003_174137.jpg
    172.5 KB · Views: 24
  • 20221003_174206.jpg
    20221003_174206.jpg
    155 KB · Views: 21
  • 20221003_174223.jpg
    20221003_174223.jpg
    182 KB · Views: 24
  • 20221006_142202.jpg
    20221006_142202.jpg
    201.9 KB · Views: 24
Update:

I have two guys coming Wednesday to put the panels on the roof and screw, secure and seal everything.

I am using colored tape to identify the different groups of panel wires for the three charge controllers.

I did the last two installs myself, However I am not steady enough to do this work on the roof.

I plan to watch and help from the ladder but even for that I will need to be careful.

Once they get the cables down and into the RV I will be able to handle the rest of the install.

I ordered an electric caulking gun to dispense the Dicor and commercial adhesive. I hope it gets here in time for Wednesday.

 
Last edited:
I have 200 watts of flexible solar panels on the roof of my RV since 2015 my grape solar panel is doing pretty but my China solar panel needs a little buffing now and then
RV solar.jpg20170524_092419.jpg20180807_171020.jpg
 
Got the panels in place. Glued down, stainless screws in all the holes and covered with dicor.

All the wiring uses the click together Bouge connectors

I did watch from the ladder on the side of the RV.

The fellow did a very good job. He works in construction and was comfortable working on the roof,

Six panels, (200 watts each), split into three pairs of 400 watts.

They feed into three networked charge controllers, each one charging one of the 300 amp hour batteries that are hooked up in parallel. The Inverter also has a 150 amp charger for when I have shore power or generator.

The 120 volt output from the transfer switch goes thru a new circuit breaker to the Inverter. The Inverter passes it thru to the main 120 volt panel. If we do not have 120 from the transfer switch, the Inverter powers the entire 120 volt power for the RV. The 3,000 watt Xantrex Inverter also supports an auto start function for the generator if the Inverter load needs it.

The bottom circuit breaker on the main panel is for the converter / charger and it will be left off because the Inverter is set for Lithium charging voltage.

I am running very large 2/O welding cables from the batteries to the back of the 12 volt fuse panel. I am installing a buss bar and connecting the old cables from the factory system to the cables from the battery bank and abandoning the old cables to the original batteries. I am not using the two AGMs from the original 12 volt system as I did not want to mix them as they are mismatched. If anyone wants the AGMs they are free to take. I am not sure how old they are but they have been working fine, besides they are free,

Here is a picture of the panels in place, the front center one is hid in front of the A/C.
 

Attachments

  • 20221012_171641.jpg
    20221012_171641.jpg
    133.7 KB · Views: 24
Last edited:
Update and change in design:

At the 11th hour and just prior to the final connections and with the help of Lou Schneider expertise I have made a change in the configuration of the system.

The original plan was to replace the existing two AGM battery bank with the much larger Lithium batteries, solar panels and a 3000 watt inverter/charger.

I had planned on disconnecting the cables and AGM batteries from the charger and DC distribution panel and replace it with the Lithium batteries.

I realized that disconnecting and removing the front AGM batteries would also disable two functions of the system. The battery start assistance button would not be functional and the alternator would not charge the house batteries.

The solution is that I will not connect the back batteries to the 12 volt system directly.

The entire new system will augment and basically be a replacement for the Electric company.

The Xantrex Inverter / charger will provide constant 110 power for the main A/C power panel and will use the WFCO convertor to provide for charging the AGM batteries and powering all the DC power needs for the RV.

The Lithium batteries will get their charge from the pass thru function of the 150 amp inverter / charger when connected to shore power or generator as well as from the 1200 watts of solar power all the time.

This configuration will basically create an alternate A/C generator powered by the Lithium battery bank.
 
I finally got the entire system up and running.

The Lithium batteries really suck up the charging amperage. The Inverter / charger was charging at 144.9 amps without the solar panels turned on. I turned off the breaker to the Inverter and will start with just the solar panels till it gets more SOC.

I think that they were sucking up the electricity because they were shipped at low charge and were charging at bulk charge rate.

By keeping and isolating the original battery bank for just the 12 volt needs, I now have 1,100 amp hours of battery capacity.

I am cleaning up the work area, and dressing up the wires and will take final pictures later today,

I also need to go thru and set all the parameters that are still on factory settings.

It was a relief to see everything come online when I flipped the circuit breaker to the inverter on after taking a few months to do this.

Once the batteries are fully charged, I plan on testing to see how many hours I can run the Air Conditioner. I will be operating at a deficit on input power without external A/C power but the 900 amp hours and the 3,000 watt output from the inverter I should have several hours without needing to run the generator to recharge.

I do have to give credit to Lou Schneider for keeping me from at least being in code if not burning down the RV.
 
Pictures of the back batteries and invertor finally wired and working.

The charge controllers are in the passenger side shirt closet in the bedroom. They are mounted on a panel that hangs on a J channel so I can get it down if needed.

The Master charge controller with IPN Pro Monitor and the Xanbus controller mounted on the outside of the shirt closet by the bed.

The way I keep cool when working in the rear storage compartment.

My hydraulic cable lug crimper.
 

Attachments

  • 20221017_130125.jpg
    20221017_130125.jpg
    192.1 KB · Views: 29
  • 20221017_130103.jpg
    20221017_130103.jpg
    245.4 KB · Views: 26
  • 20221017_130114.jpg
    20221017_130114.jpg
    225.1 KB · Views: 26
  • 20221017_130222.jpg
    20221017_130222.jpg
    178 KB · Views: 24
  • 20221017_130253.jpg
    20221017_130253.jpg
    189.8 KB · Views: 26
  • 20221014_132707.jpg
    20221014_132707.jpg
    243.2 KB · Views: 27
  • 20221014_150143.jpg
    20221014_150143.jpg
    293.2 KB · Views: 27
Back
Top Bottom